Semi-DIY Mild Engine Build for FI

Mac,

Are you going to use slipper (partial) or full skirt (NSX OEM style) piston for the engine build?

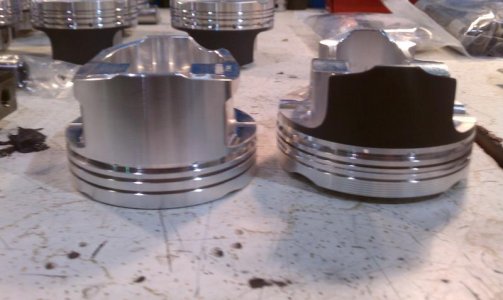
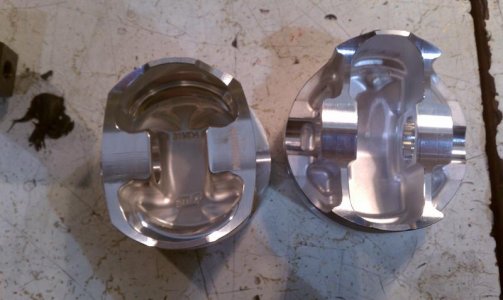
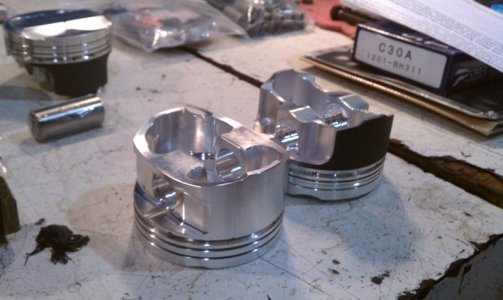
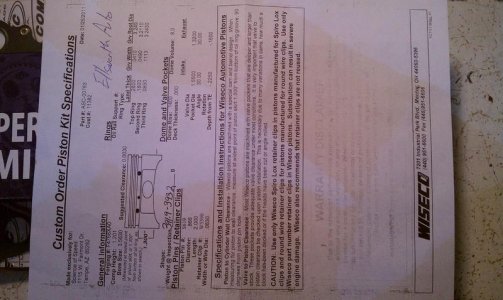
It's the standard Wiseco/SOS full skirt pistons. I'm keeping the CR OEM at 10.2:1, but ceramic-coated the domes. I also did their xylan skirt coating, but I don't think it will make any difference at all:

pistons.JPG


FINALLY! After all the holiday stuff and some last-minute playing with the tuning, I was able to start taking it apart this evening. I'm just following along the Service Manual... Got the engine and transmission oil drained, and the exhaust removed. Then coolant, brakes, fuel, and electrical connections tomorrow.

150.JPG
 
Those look like the same ones that I got from SOS, which my machine shop told me are the partial skirt version.

Here's a comparison to a full skirt JE Piston from a different engine next to it:

attachment.php

attachment.php

attachment.php

attachment.php
 

Attachments

  • IMAG0037.jpg
    IMAG0037.jpg
    44.1 KB · Views: 1,014
  • IMAG0039.jpg
    IMAG0039.jpg
    44.8 KB · Views: 1,017
  • IMAG0038.jpg
    IMAG0038.jpg
    50.3 KB · Views: 1,019
  • IMAG0041.jpg
    IMAG0041.jpg
    64.3 KB · Views: 1,018
I stand corrected then. The skirts looked big to me.

Your pistons are balanced better than mine, but mine are lighter!

Of course, that was before skirt and dome coating. Everything will get weighed again for balancing anyways later.

Draining coolant now....

Dave
 
I stand corrected then. The skirts looked big to me.

Your pistons are balanced better than mine, but mine are lighter!

Of course, that was before skirt and dome coating. Everything will get weighed again for balancing anyways later.

Draining coolant now....

Dave

Actually we have the exact same pistons. I'm going to return the ones I got from SOS and have my machine shop order from Wiseco directly with a full round skirt, thermo top coating, skirt coating, bottom piston oil shedding, and anodized ring lands.

U'll notice the difference between the SOS Wiseco and the NSX OEM piston skirt size immediately.
 
Last edited:
If you're still reading this thread, you're probably all wondering if I'll ever actually get to doing some engine work. It's embarassing to admit I've been home since December 15th :redface:

I'm not at the skill level yet of dropping engine's like Coz and Shawn, but I figure it's taken me about 8 hours total from jacking the car up to the point of actually dropping the engine/cradle.

She's finally all ready to come out. Just need to cut some wood for my cradle support on the dollies. I've got a 3-day weekend again this Friday - hopefully it will all come apart then:

IMG_4548.JPG


IMG_45491.JPG


Before it came out, I was able to spend a few hours mocking up my twin turbo placements. To do what I want, I have two options:

1) Go to rigid engine mounts so I can re-engineer the front engine mount for front bank turbo/exhaust routing space;

2) Build a custom rear header kind of similar to what Autowave did on their turbo design (routing to the rear passenger side instead of the drivers side).

There's benefits and drawbacks to each configuration.

Option 1 can have two Aerodyne turbos placed basically in the drivers side engine bay, or one twin-scroll design EFR-7670 turbo. This would be a TRUE twin-scroll design with merge from the correct pistons - not just a merge from each header bank.

Option 2 would lead to turbos placed about 3-4 feet downstream of the heads. Not optimal, but basically similar to every turbo design out there (except SOS's twin-turbo). I could do the Aerodyne's there too, or again, a true twin-scroll with really long primaries.

I would like to do Option 2 with the Aerodyne's since I'm still hesitant how they will hold up to extreme exhaust gas temperatures. Placing them 3-4ft downstream is probably best. But, I would still do a custom rear header design for optimized volumes and layout.

We'll see.

Dave
 
Skill level is only repetition :-)

Rigid motor mounts are going to kill your gearbox. There needs to be some cushion. I use the mounts Autowave and SOS sell that are stiffer than OEM but still allow for some flex.

If you're still reading this thread, you're probably all wondering if I'll ever actually get to doing some engine work. It's embarassing to admit I've been home since December 15th :redface:

I'm not at the skill level yet of dropping engine's like Coz and Shawn, but I figure it's taken me about 8 hours total from jacking the car up to the point of actually dropping the engine/cradle.

She's finally all ready to come out. Just need to cut some wood for my cradle support on the dollies. I've got a 3-day weekend again this Friday - hopefully it will all come apart then:

IMG_4548.JPG


IMG_45491.JPG


Before it came out, I was able to spend a few hours mocking up my twin turbo placements. To do what I want, I have two options:

1) Go to rigid engine mounts so I can re-engineer the front engine mount for front bank turbo/exhaust routing space;

2) Build a custom rear header kind of similar to what Autowave did on their turbo design (routing to the rear passenger side instead of the drivers side).

There's benefits and drawbacks to each configuration.

Option 1 can have two Aerodyne turbos placed basically in the drivers side engine bay, or one twin-scroll design EFR-7670 turbo. This would be a TRUE twin-scroll design with merge from the correct pistons - not just a merge from each header bank.

Option 2 would lead to turbos placed about 3-4 feet downstream of the heads. Not optimal, but basically similar to every turbo design out there (except SOS's twin-turbo). I could do the Aerodyne's there too, or again, a true twin-scroll with really long primaries.

I would like to do Option 2 with the Aerodyne's since I'm still hesitant how they will hold up to extreme exhaust gas temperatures. Placing them 3-4ft downstream is probably best. But, I would still do a custom rear header design for optimized volumes and layout.

We'll see.

Dave
 
We made motor mounts that we successfully tested to 95% -105% of the vibration absorbed in an oem mount.

Having "holes" in motor mounts that are visible to the eye does not = cushion.

The material used for the bushing itself is what provides vibration absorption and "cushioning".

It takes a very skilled engineer with expensive software and the know how to use the software... it just so happens he has a cnc machine too for any of this to make sense in a monetary manon.

If you’re looking to replace motor mounts.. there is only one mount that is a direct replacement of oem part that will never need replacing ... to say anything different than that... would just devalue their knowledge of the difference between good and bad when it come to car parts.

We have 1 set left Mac… LMK if you want to order them…

Regards
 
Thank you Ross,

If I get OEM-ish motor mounts, yours would be the only ones on my list! Those sure are nice :cool:

The problem is if I go to one solid redesigned front mount (getting rid of the OEM lower crossbeam bracket and redoing the whole mount itself), then the engineer in me says I would need to make all of them rigid to avoid overstressing my new front mount.

Dave


Dave,

Any fabricator (which i think you are now) would make the front cross member out of steel or chromoly tubing and make the front mount first.. making it an easy mount to build since recreating the cross member has "more space to work with... I think sos did a new cross memeber and a stock mount..

As far as the mounts being the same.. I can supply you the drawings and tips on do's and dont do's if you need/want. You always want to have similar bushings in all of your mounts... I can sell you a set of urethane bushings that we use with an order for a driver and rear mount.. I'll also teach you the important steps to cover making the front mount on your own.

What your trying to do has been done before.. so you should be fine.

Regards
 
Wow, Thanks again Ross.

There's a lot of things I'd like to do, but I realize I'm rapidly running out of talent and money for this build :wink:

Dave

Well just get your exhaust system patented and the money issue will be gone :biggrin:

Want to build my engine to, but there are loads of other stuff that needs doing first on my car. Drooling over this thread will suffice, for now. Good luck!
 
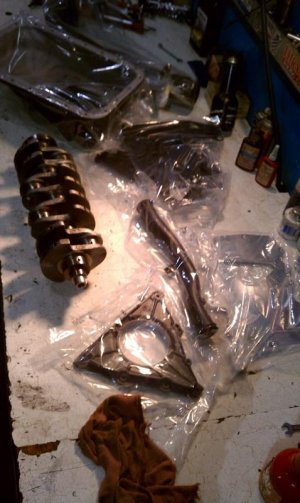
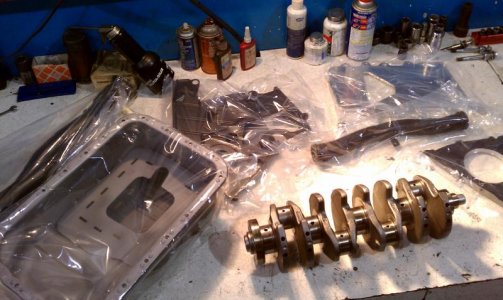
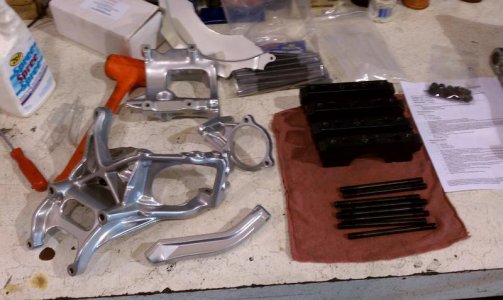
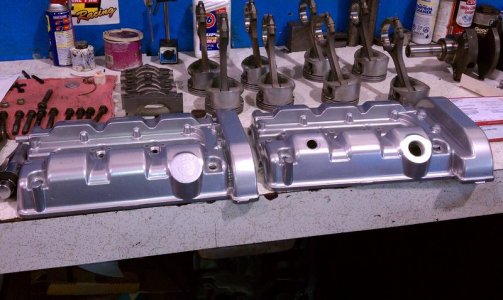
I just had the shop weld the STMPO Oil Pan Baffle and had the oil pan coated with a thermal dispersant. The rest of the parts (still sealed in their bags) have a ceramic coating.

attachment.php

attachment.php


Ignore that crank on the workbench since there are other engine projects in that shop.

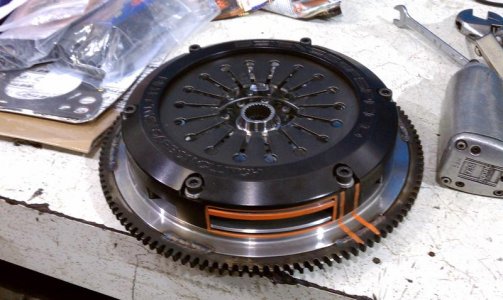
And I got the SOS Billet Twin Carbon Clutch & Flywheel

attachment.php


My machinist was really impressed with the design and construction of the clutch. I tend to agree.
 

Attachments

  • IMAG0057.jpg
    IMAG0057.jpg
    58.1 KB · Views: 975
  • IMAG0058.jpg
    IMAG0058.jpg
    67.9 KB · Views: 983
  • IMAG0056.jpg
    IMAG0056.jpg
    65.8 KB · Views: 977
Nice!

I like the ceramic coating on the coolant crossover pipe. That's what I was going to do on mine. I could never understand why some folks have a nice clean shiny new engine and didn't dress up the nasty-looking pipe. I know you can't see it (unless you have ITB's), but still.... I guess it's a pet peeve, kind of like having the inside of the alternator pulley dirty when the rest of the engine and bay is all shiny and clean.


Also, cranks should be stored vertically so as to not induce stress. Your crank or not :wink:


I've got the newer design twin RPS carbon too. It was hard for me to buy it knowing of all the glazing problems (and the $2.5k for it). I'm still hesitant to put it in.

Dave
 
......I've got the newer design twin RPS carbon too. It was hard for me to buy it knowing of all the glazing problems (and the $2.5k for it). I'm still hesitant to put it in.

Dave

I spoke with SOS and they said that there has been improvements with the clutch. Not sure if that addresses your concerns.
 
Yes, I have the improved clutch. The flexible drive hub and elimination of the kevlar liner for this version have done nothing to eliminate the carbon glazing though. I know of five of these now that have had premature glazing. That's not a good sign, and brings back memories of older crappy RPS clutch issues in the NSX day.

If you look into the carbon technology in Exedy and Carbonetics clutches, you will see they have a different process and technology. But, there is no perfect clutch, everyone has their issues. That's why I'll probably take a chance with mine.

http://nsxprime.com/forum/showthread.php?t=150967

http://nsxprime.com/forum/showthread.php?t=154284

Dave
 
Last edited:
Thanks to Coz for his suggestion to use the lower aluminum support as a cradle dolly template. It worked well. I just put ball-bearing casters directly on the bottom so I could move it around. I wanted it as low as possible so I didn't have to angle the car as much scooting it out:
Dolly.JPG


It was pretty straight-forward following the Service Manual for removal. To drop everything, engine/transaxle weight is around 800lbs from searching on Prime:
http://nsxprime.com/forum/showpost.php?p=282894&postcount=12
The axles, brakes, and suspension couldn't be that much more than 200lbs.... I needed the longer 1/2 ton boom position on my cherry picker to clear the car and my wooden dolly. The hydraulic cylinder held everything just fine. It would have been the limiting weak point since there is a large safety margin on the boom's structural steel. Just in case, NEVER get under a suspended load. While I was disconnecting the last few bolts, I also used my floor jack with a wood piece under the oil pan for extra support. I plan on doing the same when it goes back in (not looking forward to that)....

2500lb high-strength chain and hooks. This was close to the throttle body with my 12" wide load-leveler spacing:
Engine_Lift_Lugs.JPG


Just took her nice and slow on the way down, stopping frequently to check everything. I made my dolly too low, so I had to slip an extra 2x6 in to clear the top of the cherry picker legs. I'll modify the dolly when I go to put it back in:
Engine_Drop.JPG


Once everything was resting on the dolly, I made my connections for the body lift. This is what I ended up doing. It worked fine and didn't damage or bend anything, but I think I'll keep looking for a better way of lifting when it goes back in:
Body_Lift_Points2.JPG

Body_Lift_Points.JPG


Then I just lifted the body, again going slowly and checking everything often. Yes, I actually was aware my hatch was nearing the open garage door before it contacted. That's a first :biggrin:
Body_Lift.JPG


This is why I built my wooden blocks up front. I wanted to make sure my front didn't impact, as well as limit the car moving forward or backward:
Front7.JPG


It's out! Next is separating the engine and getting it on my engine stand.
Separated.JPG
 
LOL, has this turned into a Mac Attack and BATMANs joint effort thread? :tongue:

Great stuff so far Mac. Since I am what one would call "not so mechanically inclined" -- I love following these threads!
 
LOL, has this turned into a Mac Attack and BATMANs joint effort thread? :tongue:

Great stuff so far Mac. Since I am what one would call "not so mechanically inclined" -- I love following these threads!

Wow - I can't compare to his build. Look, new main caps and he's even got 8 pistons.

Don't feel bad SFDreamer: I've never taken this much apart before. I've never even taken apart a lawnmower engine... This is a first for me too :biggrin:
 
Wow - I can't compare to his build. Look, new main caps and he's even got 8 pistons.

Don't feel bad SFDreamer: I've never taken this much apart before. I've never even taken apart a lawnmower engine... This is a first for me too :biggrin:

Someone else's pistons.

Mines on the way :biggrin:
 
Back
Top