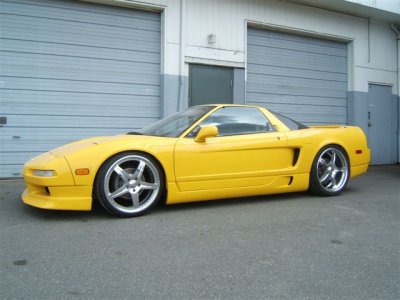
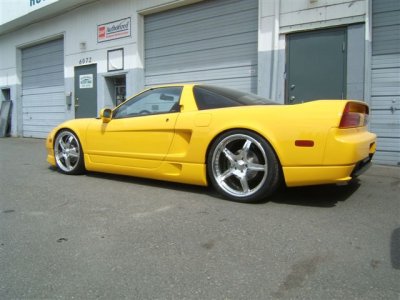
beautiful stacy! I'm still working on a group buy in MN!
-
***AVOID MARKETPLACE SCAMS!!***
Scammers are using compromised Prime member accounts to pose as a trusted seller in the marketplace. Before you enter into a deal with any seller, follow these tips to keep yourself safe. If you encounter one of these scammers, please report them immediately and we will lock their account.
Caveat Emptor!
You are using an out of date browser. It may not display this or other websites correctly.
You should upgrade or use an alternative browser.
You should upgrade or use an alternative browser.
Rocker Panels
- Thread starter stacy'snsx
- Start date
ktan,
Include me on the MN group buy. They can be shipped to Elite. Tim
Include me on the MN group buy. They can be shipped to Elite. Tim
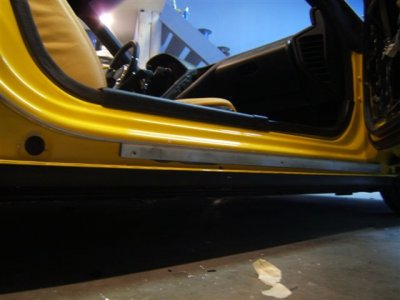
Thank-you guys.PERFECT is a big word,they definately aren't perfect but I am extremely happy with them.I will finish them tomorrow morning and post picture tomorrow afternoon(close-ups of the gaps and concerning details).I see a few of you are having problems with certain bodyshops charging alot for the fitment issues,I had mine done in 6 hours prep'd and ready for paint and I am not a bodyman.As far as installing,the door pieces took me about an hour today.I will let those dry tonight and finish the rockers tomorrow morning.I am working on making these a bolt on kit,no fitment issues.The only problem with this is I need a drivers and passenger side door to do the fitting.I can't use mine anymore as you can see.If anyone has a spare set kicking around I would be happy to make a deal on a set of doors.
Stacy
Stacy
- Joined
- 20 March 2005
- Messages
- 232
Stacy any test on 2002-on cars ..do they work with OEM door trim?
Hey Daniel
I have not found a newer body style around here to try.They will work if you use my door pieces.I know that's not what you want to hear,but it's all I can tell you at this point!!
Daniel I will private message you with an idea.
Sorry.
Stacy
I have not found a newer body style around here to try.They will work if you use my door pieces.I know that's not what you want to hear,but it's all I can tell you at this point!!
Daniel I will private message you with an idea.
Sorry.
Stacy
Last edited:
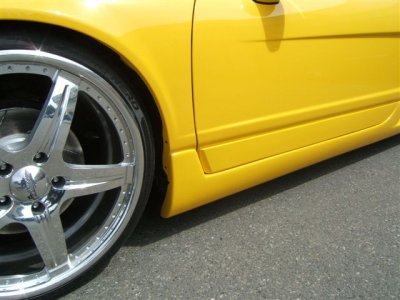
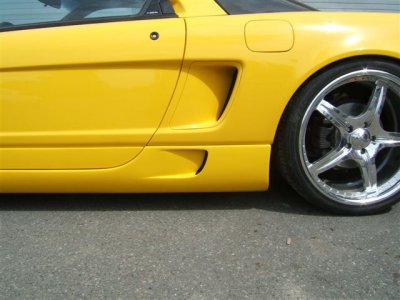
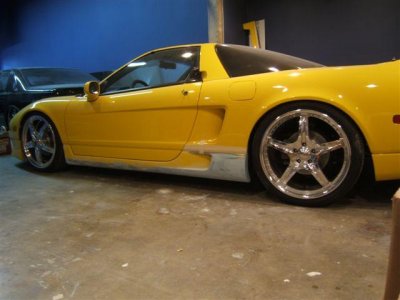
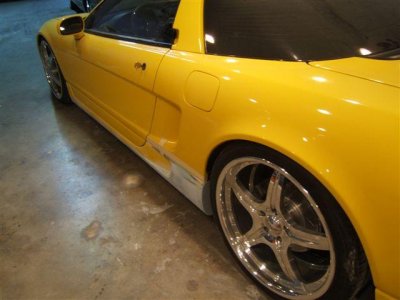
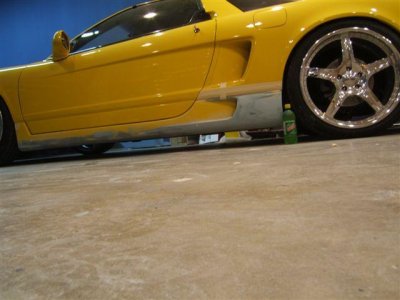
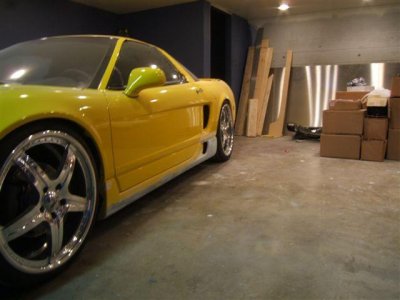
Well here is the drivers side done,we had a mishap with the passenger side panel(dropped it).Anyway as far as making this a bolt on kit,after reviewing it today,I can't see it happening.This is a fiberglass piece and needs to be fitted to the car.Here are a couple of pictures.From what I have been told these are the same height as the marga hills.
Attachments
As a promise to Stacy for getting these to me so quickly, below is the first part of my write up reviewing Stacy's Vented Side Skirts.
First I got to say that the skirts arrived very quickly, much faster than I had expected. Thanks to Stacy for getting them out so quickly.
The packing was done very well and there was no visible shipping damage to any of the parts. This is very good, and is an important aspect some people tend to forget. But these parts were packed well and were in excellent condition when they arrived.
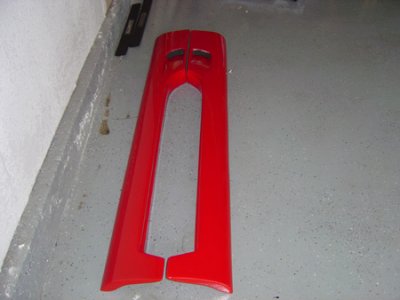
As for the skirts themselves, the first thing I noticed was the incredible quality of them. These things are incredible. The build and the quality are excellent. You really have to see them in person to really understand how well they are made. The first thing I noticed is that they are very sturdy. I read about how some of the other skirts out there tended to sag or break over time. These skirts had no flex in them at all. Very rigid and I don't see them ever sagging or warping out of shape. The second thing I noticed was that they were made very well. The lines were extremely smooth and contoured and there were no defects, warps or imperfections I could spot. Below are some pictures of the skirts, although the pictures don't really do them justice.


Also included were some aluminum brackets to attach the skirts in place. It is also my understanding that they hide the seam between the body and the skirt as well (that's my guess).

These are the door panels that fit right on the door.

Finally, included were some straps that help stabilize the bottom part of the skirt. They fit on to bolt locations on the bottom of the car and attach to the skirt with urethane so that it remains rigid.

Now for some of the weight details. As measured by my trusty USPS certified scale the weights for each of the components are as follows:
Rt Skirt - 5 lbs. 5.7 oz
Lt Skirt - 4 lbs. 15.0 oz
Rt Door Panel - 2 lbs 13.1 oz
Lt Door Panel - 2 lbs 5.2 oz
Aluminum strip/bracket (qty. 2) - 15.5 oz ea
Metal strapping (qty. 6) - 4.6 oz ea
I have no idea what the stock assembly weighs but all totaled, the new skirts should weigh just a hair over 19 lbs (un-painted and un-mounted). The only thing that puzzled me was the difference in weight between the left and right skirts. You couldn't tell by handling each one so I guess it really doesn't matter, but it reminds you that each of these are custom made.
They really look great and I can't wait to get them installed. I wish I had the ability to install them myself, but Stacy highly recommended I take them to a body shop. As soon as I can get them installed I'll follow up with part two of the side skirt installation review/write up.
First I got to say that the skirts arrived very quickly, much faster than I had expected. Thanks to Stacy for getting them out so quickly.
The packing was done very well and there was no visible shipping damage to any of the parts. This is very good, and is an important aspect some people tend to forget. But these parts were packed well and were in excellent condition when they arrived.
As for the skirts themselves, the first thing I noticed was the incredible quality of them. These things are incredible. The build and the quality are excellent. You really have to see them in person to really understand how well they are made. The first thing I noticed is that they are very sturdy. I read about how some of the other skirts out there tended to sag or break over time. These skirts had no flex in them at all. Very rigid and I don't see them ever sagging or warping out of shape. The second thing I noticed was that they were made very well. The lines were extremely smooth and contoured and there were no defects, warps or imperfections I could spot. Below are some pictures of the skirts, although the pictures don't really do them justice.


Also included were some aluminum brackets to attach the skirts in place. It is also my understanding that they hide the seam between the body and the skirt as well (that's my guess).

These are the door panels that fit right on the door.

Finally, included were some straps that help stabilize the bottom part of the skirt. They fit on to bolt locations on the bottom of the car and attach to the skirt with urethane so that it remains rigid.

Now for some of the weight details. As measured by my trusty USPS certified scale the weights for each of the components are as follows:
Rt Skirt - 5 lbs. 5.7 oz
Lt Skirt - 4 lbs. 15.0 oz
Rt Door Panel - 2 lbs 13.1 oz
Lt Door Panel - 2 lbs 5.2 oz
Aluminum strip/bracket (qty. 2) - 15.5 oz ea
Metal strapping (qty. 6) - 4.6 oz ea
I have no idea what the stock assembly weighs but all totaled, the new skirts should weigh just a hair over 19 lbs (un-painted and un-mounted). The only thing that puzzled me was the difference in weight between the left and right skirts. You couldn't tell by handling each one so I guess it really doesn't matter, but it reminds you that each of these are custom made.
They really look great and I can't wait to get them installed. I wish I had the ability to install them myself, but Stacy highly recommended I take them to a body shop. As soon as I can get them installed I'll follow up with part two of the side skirt installation review/write up.
He has received them,waiting on the bodyshop !Zero-Cool said:Door pieces mising! I can't wait! :biggrin:
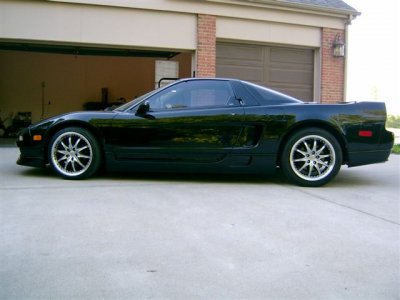
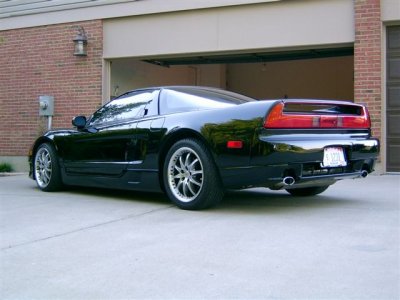
Also here are a few pictures of RUFNSX's car.Once he lowers this it will enhance the look.
Attachments
has anyone actually installed these themselves????
Mine arrive today, but i'm somewhat nervous. There are a few people anticipating that it will be installed on my car this saturday. My body shop is ready to paint tomorrow morning.
I'm planning on fitting them tonight myself because of 1 small glitch, the motor is out of my car and i cannot drive it to the body shop.
I'm tempted to ask one of the bodyshop guys to go over to my car and fit them tonight on the side.
Any tips? I can build a motor, but i've never done any body work.
Thanks
Kevin
PS. It was a pleasure working with stacy and he made the extra effort to get my set here on time
Here is the latest design,it is for the DRIVEWAY CHALLENGED !!
This kit is called "Signature Series",it varies a little from the last one.The strakes on the vent have been stretched,the area behind the vent is more rounded,last and most important,it is almsot the same height as stock(only .5 inches lower).Molds are being made right now,the fiberglass shop has ensured me they will be ready to ship by end of next week.
Stacy
Attachments
ktan said:has anyone actually installed these themselves????
Mine arrive today, but i'm somewhat nervous. There are a few people anticipating that it will be installed on my car this saturday. My body shop is ready to paint tomorrow morning.
I'm planning on fitting them tonight myself because of 1 small glitch, the motor is out of my car and i cannot drive it to the body shop.
I'm tempted to ask one of the bodyshop guys to go over to my car and fit them tonight on the side.
Any tips? I can build a motor, but i've never done any body work.
Thanks
Kevin
PS. It was a pleasure working with stacy and he made the extra effort to get my set here on time
I installed them myself. After no luck in finding a reputable body shop to do the work, I ended up doing it myself. I'm a handyman, but in no way a body guy. I can't even build a motor, but I didn't have too much of a problem doing the install myself. The mounting bracket that Stacy supplied really made it easy. I even had to do the install twice because I learned the hard way that double sided tape and 110 F Las Vegas heat don't mix! :biggrin:
The entire job took me one whole day and that was with me being really careful and learning as I went along. An experienced guy could probably do it in half. The thing is the skirts are absolute QUALITY!!! and it made the job much easier. The fitment, build and strength of the skirts are all top notch. Also it didn't hurt that Stacy walked me through the entire install process with pics.
I've been meaning to do a small write up on how I installed my skirts, but I've been so busy lately I just haven't had the time (sorry Stacy!! :redface: ) But as soon as I can free up one afternoon I'll post my DIY.

Where can I buy these brackets? I have a few of these but need more.
Thanks,
Steve
I have not sold a kit to him,meaning I didn't short him.I beleive they are for his HID kits.
Stacy
Stacy
Funny you should ask,I just looked at them today.They need some minor cleaning of the edges and good-to-go !!!
I have two sets(Signature series)and one of the originals right now.One set of the Siganature Sereies is for you Johnny(Mackash)if you still want them.I am thinking of putting the second set on my car,however I have had someone with the newer bodystyle wanting to try them(whealy).So I may part with mine so he could try them.(second set).The fiberglass shop I am using can however produce around 5 sets a week.
Anyone interested please let me know.
Stacy
I have them right now(Signature Series).They are the same ones I sent you pics of.There is no difference between the prototypes in the pic above and the ones the fiberglass shop has made.The ones in the pics above are the protoypes,the molds were made from those.I personally do not do the fiberglass work,I have a professional shop do this end of things.I only create the prototypes!!
Stacy
Stacy
Stacy - Im in Toronto and have an 02.
Any luck with testing these on an 02+ yet?
Me needs your panels!
Any luck with testing these on an 02+ yet?
Me needs your panels!
Similar threads
- Replies
- 5
- Views
- 324
- Replies
- 26
- Views
- 1K
- Sticky
- Replies
- 0
- Views
- 5K


