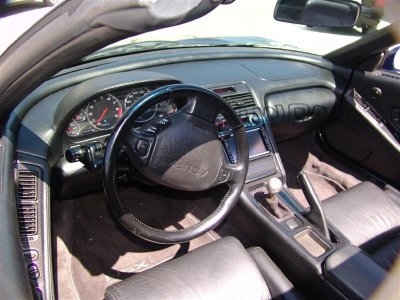
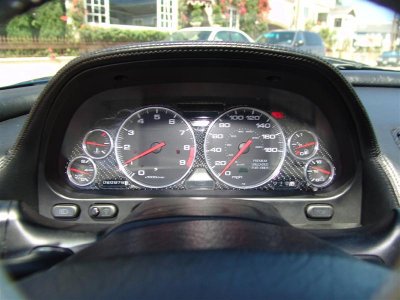
Has anyone attempted to repair or paint there dash trim before? I've seen pictures where some people have painted it different colors but was wondering if you have to prepair it in any special way or how to repair it if it has the foil like crinkling or cracked?
You are using an out of date browser. It may not display this or other websites correctly.
You should upgrade or use an alternative browser.
You should upgrade or use an alternative browser.
Painting Dash and door pieces
- Thread starter NSX~PERT
- Start date
I had mine repainted by Joe L. at Vince's Auto Body in NY. Came out great, it was repainted to the factory color. Mine had a few scratches and one good size chip.
He is pbassjo on these forums, send him a PM .
.
HTH,
LarryB
He is pbassjo on these forums, send him a PM
HTH,
LarryB
Thanks LB
I PMed him lets see if he replies. Were your damaged in any way or just wear & tear? Mine are cracking from the south florida sun I guess or just a 91' so I wanted to know if by sanding it down the repainting it is the way to go and make it look OEM again. I also have one small crack from someone trying to pull it out once w/o knowing how to at the stereo place that did my sound system. How can I repair that crack also (ie. fiberglass, epoxy, ect......)
I PMed him lets see if he replies. Were your damaged in any way or just wear & tear? Mine are cracking from the south florida sun I guess or just a 91' so I wanted to know if by sanding it down the repainting it is the way to go and make it look OEM again. I also have one small crack from someone trying to pull it out once w/o knowing how to at the stereo place that did my sound system. How can I repair that crack also (ie. fiberglass, epoxy, ect......)
You should take your car to a good stereo shop to have them repair the console trim. The cracks and imperfections can be repaired with a short stranded fiberglass body filler and/or Bondo. The bubbling electroplated nickel finish is easier to peel than it is to sand down smoothly. People usually pick it off with an X-acto knife but it's a long and tedious process. It needs to be next to perfect for paint, you need to get rid of as many imperfections as you can before paint gets shot on it.
You can probably do a lot of the pre-finishing work yourself if you don't mind the work. The plastic coating over the electroplating can easily be removed with Jasco Graffiti remover (do not shoot this onto bare plastic, the entire console trim is fine but not after you peel away the electroplating). You will then be down to the electroplating once that plastic stuff is stripped off, it's a black chrome looking finish that you can peel off almost like a foil. If you have enough time, peel all the foil off. If not, you should peel it off in all the affected areas and then some. Then you need to apply minor amounts of body filler to fill in the imperfections and sand everything smooth.
All said, an experience car stereo shop is usually a good place to go to since they are used to doing this type of work.
Here are some threads that might help if you do this yourself:
http://www.nsxprime.com/forums/showthread.php?t=55311
http://www.nsxprime.com/forums/showthread.php?t=35975
You can probably do a lot of the pre-finishing work yourself if you don't mind the work. The plastic coating over the electroplating can easily be removed with Jasco Graffiti remover (do not shoot this onto bare plastic, the entire console trim is fine but not after you peel away the electroplating). You will then be down to the electroplating once that plastic stuff is stripped off, it's a black chrome looking finish that you can peel off almost like a foil. If you have enough time, peel all the foil off.
All said, an experience car stereo shop is usually a good place to go to since they are used to doing this type of work.
Here are some threads that might help if you do this yourself:
http://www.nsxprime.com/forums/showthread.php?t=55311
http://www.nsxprime.com/forums/showthread.php?t=35975
Guys,
Mine is factory color restored. I know it has a chrome type finish under the paint, saw that when I had the chip . Joe can fix it, or just send it to Malibu!!!!!!!!!!!!!!!!!!!!!!!!
 .
.
Regards,
LarryB
Mine is factory color restored. I know it has a chrome type finish under the paint, saw that when I had the chip
Regards,
LarryB
The only problem I found after the fact with my own project was that when my car was sitting baking in the 100 deg sun the aerosol-applied paint began to bubble in a couple of places on my Nav Pod & console. It had been on ~ 1 year at that point with no issues.
I decided to invest in a body-shop finish as the final step paint finish at that point - was a good deal in my opionion, $160 for the console, ash-tray cover, Nav Pod & two door panels. (I did all the dis/re-assembly of course - all paint shop had to do was prep & paint)
I am well satisifed with the results.
http://www.nsxprime.com/forums/showthread.php?t=56273
(Incidentally the "before" pics in Honda Graphite Grey were my self-applied Aerosol touch-up paint)
Thanks for the links to the other threads on this same issue, great info. Do you guys think paint stripper will be good to remove the OEM coating? I think I'm going to have my friend paint the trims in the OEM Berlina Black with clear coat. What do you guys think?
- Joined
- 27 April 2005
- Messages
- 39
You are in SoFla right? No question about it, i recommend that you contact Andy "Buzz" Lehrer at Buzz-Off Auto Alarms.
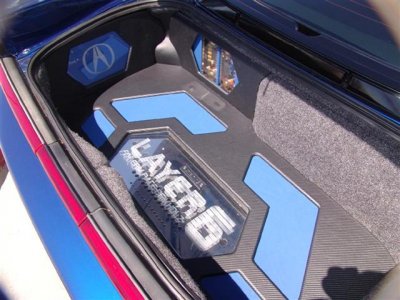
It sounds crazy since it is an alarm shop, but if you have seen pics of my ride you know what i am talking about. He did a great job in the cockpit and the trunk. Believe it or not, i bought my car sight unseen from Andy then paid him to pimp it out before its long truck ride to SoCal.
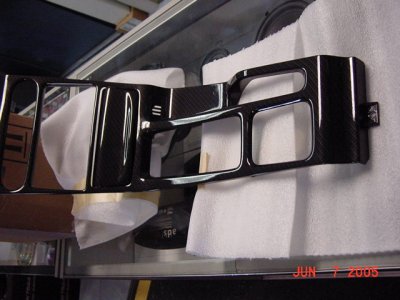
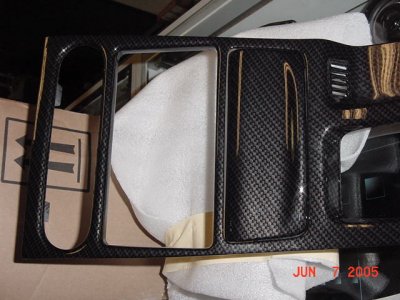
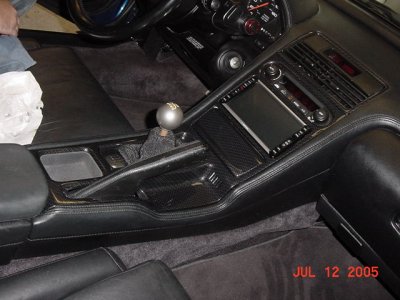
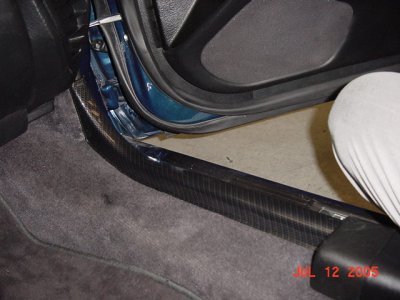
I went with a carbon fiber look for all the interior plastic. I dont know all the details except that it was called hydrogliding or something like that. Luckily computer security pays well, cause if i had to work on my car it wouldn't be pretty. I guess we all have different gifts. =-)
i will attach some before and after shots.
http://www.buzz-off.com
813 882 8477
Attachments
- Joined
- 27 April 2005
- Messages
- 39
- Joined
- 27 April 2005
- Messages
- 39
It is in Tampa, FL. email me at [email protected] and i will zip up the files and send them over. can anyone else see them? damn computers! 
- Joined
- 27 April 2005
- Messages
- 39
I dont remember what he charged, but it seemed fair to me. You must have just missed my last post; he is in Tampa, FL. You can reach the shop at 813 882 8477 or go to their kind of boring website. http://www.buzz-off.com  you could email him too if you want: [email protected]
p.s. did the red X thing get fixed? can you see the pics i attached now? I assume you can since you said you liked them.
p.s. did the red X thing get fixed? can you see the pics i attached now? I assume you can since you said you liked them.
- Joined
- 27 April 2005
- Messages
- 39
stripped, sanded and re-glassed just like the wood grain stuff in my Audi S4 or in a Mercedes.
NSX~PERT said:Malibu,
There has to be a much easier way to remove the foil off the dash pieces, Ive been trying to remove every lil piece and ive gotten like 10 cuts from it and its not coming off that easy, any suggestions?
I wish there was. Both Ken and myself use this method and until someone finds a chemical that can strip the foil off and not hurt the plastic, I think we'll be stuck with using X-acto knives and patience.
I've done the peel myself and yes, it's painfully slow. But I found that if you use an x-acto knife and cut thru the foil along the outside edges of the piece (where it won't be visible), you can then often get enough of an edge piece started that you can peel back a large area at once. The rounded openings are much tougher and I found the area around the vents near the emergency brake handle to be brutal. I even wound up getting some knife scratches in the plastic but since it's plastic, it sanded out. BTW .. I've done the center console and door handle pieces as well and used a company called Fibrenew which was fairly inexpensive and has held up well ... although we don't get the high heat that Florida/Arizona/California does.
I've actually used another method the very first time I stripped one - working with a friend who had done his this way, we sanded the material off. That was an awful lot of sanding!
As painstaking as the peel & strip method seems, to me it's still the most productive way to do it.
As painstaking as the peel & strip method seems, to me it's still the most productive way to do it.
I too tried the peel off technique...it went on for ever it seems. For the value of my time, I've decided to instead just buy the three pieces (OUCH$$$$$)
I've got the old ones ($70 each) if someone is interested.
I've got the old ones ($70 each) if someone is interested.
I just did mine. The body shop had me peel off all of the chrome that was "bubbling" up then sand the transition points (leaving much of the chrome & original finish still on the peices) and scuff the rest of the peices. I also had to repair 2 of the panels because someone tried to pull them out improperly.  I just epoxied them then used some plastic weld on the back sides and sanded the area on top smooth. Time will tell if this worked - but the body man (really anal about prep-work) was ok with these methods. The finish may not come out "perfect" from the body shop - especially if you ask for a thick clear-coat like I did. But I was able to wet-sand then mini-buff the pieces to a glass finish).
Good luck!
Good luck!
ML motorsports can you post pics of the finish product. I to am doing as you did removing and peeling off the bubling parts and sanding down the transitions till you cannot even feel the transitions. Then I will get my body shop to paint them. I was wondering if the old pices that remained stood out when you painted them or did the thick clear coat cover it up?
I left out one key step - filler primer! that is how you make the transitions completely disappear. The painter suggested it. You can get it at probably any parts store (i think it was Duplicolor). I used almost the whole can on the 4 pieces (including coin tray) sanding smooth probably 3-4 times in the process. It is at this step that you can catch any "terrain" changes and apply the primer thicker in those areas then sand again once dry to smooth it out. In my case it was the points where I epoxied that I was trying to cover - the transition points from plastic to oem finish disappeaered with the second application of filler primer, if not the first. We used a thicker clearcoat mainly so I could wet-sand with no chances of going through it. Ironically the more clearcoat the worse it looks to a point. I didn't need to wet-sand much to make it perfect though. I don't have any great shots of the dash pieces, (and the car is back in storage). The best shots I have are in another post: http://www.nsxprime.com/forums/showthread.php?t=57999&page=3
towards the bottom. As you can see there's an irregularity on the console panel near the top right of the ash tray door. That's not a flaw - but thats where the peice was originally broken. Upon install it re-broke BUT the paint amazingly held only leaving that mark.
Hindsight, I would have epoxied a stiff peice of metal behink that break. I will probably re-do the console when I get a new boot - but I'd had enough of the job for a while so I left it. I personally like the gloss finish more than I thought I would. The painter was very reluctant to do a semi-gloss finish because it's difficult to do well.
MLmotorsport said:I left out one key step - filler primer! that is how you make the transitions completely disappear. The painter suggested it. You can get it at probably any parts store (i think it was Duplicolor)....
(All thumbnails are clickable to larger pics)
This is the High Build Filler Primer on the left
If you compare these three pics (all the same piece at different steps of process), you can see the transition from foil to plastic at each side of the top of the opening for the ashtray in the first pic; then in successive pictures it is covered with the filler primer and sanded before a final top coat of regular sanding primer. You can see there is no trace of surface imperfections or the gradient transition & that is what you want before colour coat & clear coat.
Be careful using too much aerosol can based primer - my finish painter cautioned me that because of the difference in the thinners between aerosol based & professional gun, it can cause problems. You don't want it too thick & to be sure it is well-cured between the finish paint process.
After you apply the filler primer you will actually be sanding most of it off the highest level, leaving it in the recessed lower spots. You must use a sanding block to ensure you end up with a planar surface. It helps if you start by using a different colour as the initial primer coat (sandable primer is fine) as a marker reference coat then the grey filler primer after; sand back the filler primer till the high area is starting to come back to the initial colour while the low spots will remain grey. This helps define how much you are cutting back.
Finish with your thinner sandable primer with just a light surface sanding (800 - 1000) to smooth it out without breaking through to the lower level.
.
Similar threads
- Replies
- 2
- Views
- 296
- Replies
- 29
- Views
- 783
- Replies
- 10
- Views
- 391


