NSX-R Chassis Bar Install On An '02

LOL you know it! :biggrin:

Actually I was thinking of sanding it down and painting it flat black... still waiting on my front stabilizer bar then I'll have it installed... :wink:
Use some flat black primer before you actually paint it and it may give a little more chip protection. I will eventually have mine covered with the clear bra material to protect it. It would be a pain in the butt to have to remove it to repaint the bar because of rock chips.
 
The shop installed my front bar and i installed the lower bar tonight.

You can install the lower bar without unbolting the battery tray. With the bar upside down slide it in from the passenger side above the battery tray. When you get it to the other side just roll it right side up.

There are two 17mm bolts on each side. The ones you want are the bolts toward the front of the car.
 
Would you need the spacers from SoS if the Dali 1" sway bars are used?
 
I just installed my upper stiffener this weekend. I had it anodized black. Cost me $30. It was a little spendy, but I will never have to do it again. I also touched up the A/C parts and the lower half of the radiator that were painted black, with some satin black.

If you have the nose off be sure to take off the horns and clean them up with a fresh coat of paint. Mark them cuz they are different. Also take off the windshield washer tank and give it a flush.

I was really happy with the completed job. When you look at the front of the car all you see is the front bumper. Everything behind that is a black hole.

Brad
 
This is my fist suspension mod [ SOS upper and lower Chassis R bars on 2002 NSX-T] and I noticed the difference immediately. It's more crisp and responsive on the turn-in, much more solid on highway and street, more stable over RR tracks and quieter in general – I've had the car a long time so I really noticed the difference.
<?xml:namespace prefix = o ns = "urn:schemas-microsoft-com:office:office" /><o:p> </o:p>
Here's the how to [ in addition to this existing and other great threads]:
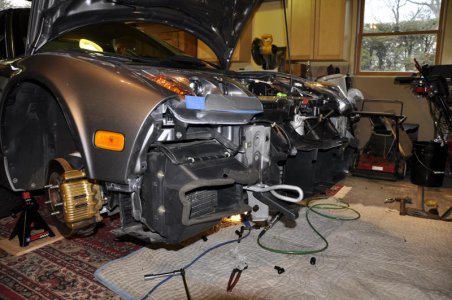
You'll need an extra set of hands to lower the bumper off and to put it back on.
I taped the bottom of the headlights with painters tape and duct tape- edges of bumper can scratch the lens on the way off or on, I scratched mine- tiny scratch no biggie [Pic 1].
<o:p> </o:p>
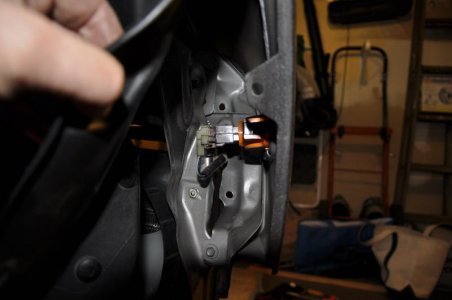
Picture 2 is a look inside the passenger side skirt. The empty holes are where the two bolts [ per side] come through from bumper. I secured the nut to the socket with a little painters tape, so it did not fall off during the install. The third place where the bumper connects inside the skirt is a bolt that can be found by following where my thumb is pointing [ not visible in photo]. The other three bolts per side in front are easy to find.
<o:p> </o:p>
Reaching through the grill area, disconnect the air temp sensor behind license plate and horn. Also disconnect electrical connector to WW washer [ can be done from above]. I used a one man brake bleeder hose to keep fluid in reservoir, it worked great.
<o:p> </o:p>
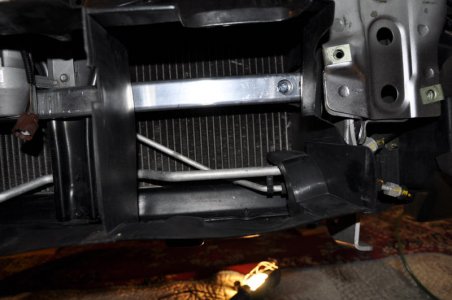
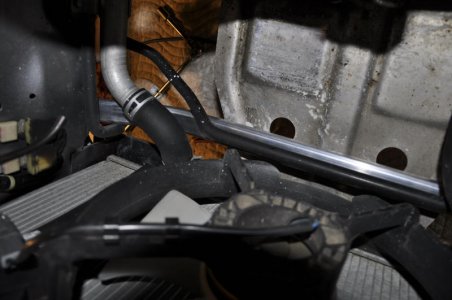
Pictures three and four are of the bars installed. Keen eyes will note that the drivers side tow plate is bent a little- I am not sure how that ever happened [ maybe from a flat bed haul?]- I took it off and pounded it as flat as I could- I put it in a vise but was not comfortable straightening it that way.
<o:p> </o:p>
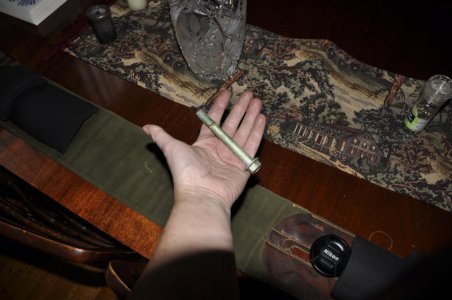
Picture 5 is one of the bolts that held in the lower chassis beam- I noted a bit of corrosion so I slightly greased the corroded area [ not sure if that's a best practice ].
<o:p> </o:p>
It took me 2 hours to get the bumper off. 2 hours to get the upper bar on [ because the plate was bent] – 20 minutes to get the lower bar on [ lower battery tray by unscrewing bolts till they are almost all the way out].– Re-assembly was quick, maybe an hour- next time the bumper will come off in 30 minutes.
 

Attachments

  • 1.jpg
    1.jpg
    92.8 KB · Views: 201
  • 2.jpg
    2.jpg
    40 KB · Views: 191
  • 3.jpg
    3.jpg
    54.4 KB · Views: 191
  • 4.jpg
    4.jpg
    54.8 KB · Views: 185
  • 5.jpg
    5.jpg
    67.2 KB · Views: 182
You can install the lower bar without unbolting the battery tray. With the bar upside down slide it in from the passenger side above the battery tray. When you get it to the other side just roll it right side up.
 
Back
Top