My 92 Berlina Black Build Progress

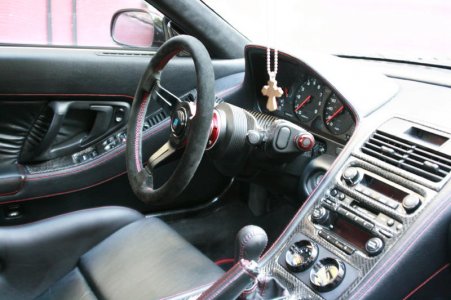
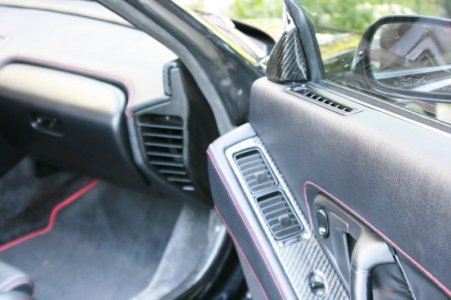
make sure to take a few wide shots of the interior overall. dying to see how all the seats, leathers, cf, steering wheel etc etc etc all come together! :biggrin:

also in addition to the 02+ front end; what kind of side skirts/rear are you going to get?

I did however fitted all my CF interior pieces back on and I will take some pictures this weekend (weather is pretty bad here in Washington DC area)

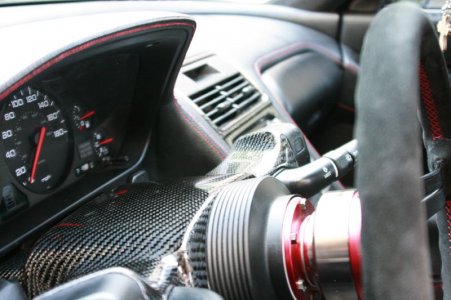
Ben/Daisy Imports changed my oil/coolant temp sensor/fuel filter today (Thanks Ben !!). Also, to the future SOS ITB owners, the instruction you get with the kit does not mention anything about intake temp sensor. For me, we wired up Mazda sensor and left it exposed to the atmosphere.
 
I need to work on my photography skill :frown:
 

Attachments

  • _MG_0479.jpg
    _MG_0479.jpg
    62.8 KB · Views: 974
  • _MG_0480.jpg
    _MG_0480.jpg
    68.2 KB · Views: 1,082
  • _MG_0496.jpg
    _MG_0496.jpg
    56.1 KB · Views: 851
  • _MG_0482.jpg
    _MG_0482.jpg
    62.5 KB · Views: 923
Last edited:
help me with my nsx one day and ill help u with photo skills :)

looks great man. how does the 02 conversion coming?

I got the list ready but I've been pretty busy. I may wait on ordering parts until maybe January since starting to get cold for me to do anything with the car. But we'll see :wink:
 
makes total sense to me. no rush as u've done so much already!

I got the list ready but I've been pretty busy. I may wait on ordering parts until maybe January since starting to get cold for me to do anything with the car. But we'll see :wink:
 
those parts look fantastic. you did an awesome job!
I overlay parts with CF, and it's not easy when you get into more complex curves.

Did you clear the parts with a urethane clear? or did you just polish the resin?

Thanks, I sprayed three coats of clear and then wet sand/polished them. It looks 1000x better in person :smile:
 
Wheres the vtec shift point set to? Looks like it should be a couple rpm higher to smooth out the crossover. Just a thought.

Any how you have a great build here. Keep up the good work.

I got my car tuned and I am very disappointed with the numbers. Only 20whp gain after ITB. I'm not sure if something is wrong, but this is nowhere closed to what I saw from Dan's gain

Dyno1.jpg
 
Last edited:
Wow, so much has been done in such a short amount of time since I last saw this thread. 20hp seems like there will a lot left on the table (I hope) for you, but the power curve LOOKS really good (nice and pretty flat all the way up) and you made a pretty good improvement to your torque curve.

The build is really awesome, keep on keepin' on man!

Edit: please put some sort of filter on those beautiful stacks!
 
Tae quick question...Im wondering if you inspected the VVIS butterfly bolts after you installed your ITB's. There's several posts about those bolt causing catastrophic damage when they back out. Can you post a pic of your oem manifold and butterflies for reference (if you still have it).
Thanx main
 
Next mod - headliner/inner A/B pillar/visor wrap in deep black Alcantara. I sourced the fabric from Jeff (Vrooom, another GREAT guy..item was shipped the same day I paid)

Removing_gray.jpg


Parts -
http://www.nsxprime.com/photopost/showphoto.php?photo=45341&title=parts&cat=1349
http://www.nsxprime.com/photopost/showphoto.php?photo=45284&title=tae-27s-build&cat=1349
http://www.nsxprime.com/photopost/showphoto.php?photo=45327&title=tae-27s-build&cat=1349

little process pictures


Headliner.jpg

Copy_of_finished.jpg

Very inspirational thread! Thanks. I'm currently in the process myself of getting my headliner wrapped and I would like to know if you have any tips for this part? I think it will be difficult getting the fabric to follow the "tops" and "valleys" on it without creasing. What kind of glue are you using? Does it stick immediatly or is it just "tacky" and hardens after a while? That would make it easier getting this done, if the fabric could "slide" around on the headliner before the glue hardens.
 
update tae?

Nothing new to the car. However, my basement is filling up with parts :wink: so stay tuned

Tae quick question...Im wondering if you inspected the VVIS butterfly bolts after you installed your ITB's. There's several posts about those bolt causing catastrophic damage when they back out. Can you post a pic of your oem manifold and butterflies for reference (if you still have it).
Thanx main

I did not inspect the VVIS butterfly bolts since there was no need for me to take the manifold apart

Very inspirational thread! Thanks. I'm currently in the process myself of getting my headliner wrapped and I would like to know if you have any tips for this part? I think it will be difficult getting the fabric to follow the "tops" and "valleys" on it without creasing. What kind of glue are you using? Does it stick immediatly or is it just "tacky" and hardens after a while? That would make it easier getting this done, if the fabric could "slide" around on the headliner before the glue hardens.

I used the Landau Top&Trim contact adhesive (this is the glue Jeff recommanded to me) After applying the glue, it took maybe a minute before it became tacky/hard.
I started from the "valley (right above the head area)" and then laid the fabric towards the edge/center with absolute minimal stress/stretch (really important!!). ***heat gun was my best friend***

Additonally, I covered the headliner and pressed it down with sand for couple of days before the reinstall.

Ok that sounds like a proper adhesive. How much "stretch" is there in Alcantara? The fabric I'm using is almost completely stiff. So Alcantara becomes more stretchy when heated?

Good tip on the sand! Gonna have some on standby if needed.
 
Ok that sounds like a proper adhesive. How much "stretch" is there in Alcantara? The fabric I'm using is almost completely stiff. So Alcantara becomes more stretchy when heated?

Good tip on the sand! Gonna have some on standby if needed.

Not much stretch but enough to get rid of any crease. Heat gun does not stretch the fabric. I used the heat gun to melt the glue in the areas that needed to be re-lifted and stretched
 
My headlights came in and I decided to add a little flavor to it :biggrin: I don't want to crack my headlights just yet!

HD.jpg

too much silver chrome for my taste

HD1.jpg

My friends helped putting on the film.

HD3.jpg

OEM VS Yellow tint

IMG_4680_2_.jpg

Both are done

IMG_7779.jpg

I had to do it !!:biggrin:
 
the DIY master returns!

CAN'T WAIT!

My headlights came in and I decided to add a little flavor to it :biggrin: I don't want to crack my headlights just yet!

HD.jpg

too much silver chrome for my taste

HD1.jpg

My friends helped putting on the film.

HD3.jpg

OEM VS Yellow tint

IMG_4680_2_.jpg

Both are done

IMG_7779.jpg

I had to do it !!:biggrin:
 
pardon my ignorance, but the tape is to protect the existing paint from getting scratched up as you adjust the new parts for proper fitment+alignment??

taped and ready to go!

IMG_2488.jpg


IMG_5586.jpg

My friend Xavier (Tech7042) came out to help. I think it took us less than an hour to strip the car down. Xavier is a BEAST!! check out his build thread if you havent http://www.nsxprime.com/forum/showthread.php?t=151472 :wink:

IMG_6613.jpg

Not bad at all !!:biggrin:
 
Back
Top