Honcho's Long Road to Imola Type-S Zero

Hood Latch

You may remember earlier in the project I used my home-made media blaster to prep some rusty metal parts. One was the hood latch.

20201208_155147.jpg

DOesn't it look so pretty? Yeah, well, I forgot to paint it and just put it on the car. After driving through that torrential rainstorm on the way to the cancelled big car show, the damage was done.

20240121_132219.jpg

Rather than re-blast it and paint, a new one was only $15.

20240121_132222.jpg20240121_132308.jpg

All fitted to the hood with a little grease on the catch. Looks nice.

20240121_132746.jpg20240121_132749.jpg
 
Body Bolts

The car is nearly done, done. The last major item is a trip back to the body shop to do a few fitment tweaks, fix the door beam/window problem and touch up all the nicks and bolts from the rebuild process. A casualty of waiting to do this are the body bolts. These were all red, so I stripped them on a wire wheel and re-used them. However, like the hood latch, I also stripped off the zinc-coating. Car washes and rain caused corrosion.

20240121_125050.jpg

After seeing nice new bolts on @NSX_n00b 's car (and realizing I was an idiot for trying to reuse my old ones), I bought new body bolts. To my surprise, they are now black. It looks like a black oxide coating like you see on outdoor fence hardware.

20240121_125038.jpg

I replaced as many as I could reach without taking the car apart. They actually look cool on the Imola color.

20240124_171543.jpg

For the ones I can't reach, I'm going to have the shop spray those with Imola paint, since they will have some of the panels off for re-fitting.
 
Last edited:
Mothership

The Zero was at Honda today getting it's headlights properly aimed.

1000013360.jpg1000013361.jpg

They also checked the battery, which was fine. Apparently, my battery light resulted from sitting for 2 weeks in the cold. It was just low. Driving the car charged it back up. It's the first time I've ever seen the battery light turn on in the NSX! A symptom of my small Type-S battery. I plugged it into the tender overnight just to be safe.

1000013358.jpg
 
Holy moly -your dealer services NSX? Mine would tell me I am at the wrong place...
For aiming headlights, yes. I originally went to exchange my Honda battery since I thought it was dying and it was still in warranty. They have a level floor and big wall, so I gave them the service manual page that tells you how to aim the lights and they had it done in 20 min.

For any major service, I do the work. :)

The car drew quite a crowd, including the dealer owner. Customers waiting for service on their CR-Vs and minivans went nuts. None of them had any idea Honda made the car.
I want to drive over to your house for some maintenance classes :)
 
I want to drive over to your house for some maintenance classes :)
You would not be the first owner to do a self imposed nsx sabbatical...The most famous was Fl nsxca president Wei Shen who spent time with the infamous Mark Bashe way back..Some folks also hung around Larry B's house ..aka asimo
 
General Update

You may have not noticed much happening in the blog. It's for a good reason- the Zero is back at the body shop getting its final touchups and fixing that annoying door beam that is interfering with the driver window trolley. Here's what we are doing:

  • Airbrushing all body bolts in Imola body color.
  • Touching up all nicks and scratches from reassembly.
  • Removing and re-fitting side sills. The driver side is still contacting the door and the paint is rubbing off in a couple spots. It needs about 1mm more clearance. After fit is confirmed, they will touch up the spots.
  • Adjusting the trunk lid. I got it close but it needs to come back about 1 mm.
  • Addressing the door beam interference. Thankfully the "beam" at issue is just the panel stiffener, not the intrusion beam, which is a safety item. If they can't bend/glue it back into place, they're just going to cut a notch to allow the window trolley to clear. No one will ever know (unless they are the like three people who read this blog!)
  • Touching up the nick on the front wheel from that chunk of construction concrete that I *almost* dodged.
Once we're done, the Zero is heading to the dyno. We'll see if we can break the 300whp mark after all this work...
 
Body Bolts

Fresh from the shop. Mike had to order some more paint, which is why it took a week. They even used primer on the bolts!

Prepping:

image3.jpegimage4.jpegimage5.jpegimage6.jpeg

Primer going down.


image10.jpegimage11.jpegimage12.jpeg

Then the color goes on.

image13.jpegimage15.jpeg

Looks factory!

image2.jpegimage1.jpegimage0.jpeg
 

Attachments

  • image7.jpeg
    image7.jpeg
    110.4 KB · Views: 5
Update

Stopped by the shop to check on the car. It's pretty much finished. Mike was able to notch the door panel beam to get the window trolley to clear. All of the nicks are painted and all of the bolts are now body color. He also was able to fix the side sills, which were rubbing the doors slightly when they closed. They also fixed some of the small spots where the factory red was showing through. He was able to get the trunk panel lined up much better than I did. The car looks perfect.

He's got a couple more areas to finish up (he's working on the wheel chip) and I should have the car back on Saturday. It's such a relief to finally be done!

Once I get the car back, I will align the driver glass properly. I asked Mike to leave the door panel off. Once the glass alignment is set, I'll install the membrane and door panel. Next, I'll re-torque the motor mounts in the proper order since they've been out of sync since the A/C repair in the fall. The engine is a little shaky due to this, but nothing bad.

After all this, it's off to the dyno for final open loop tuning.
 
Window Alignment

Car is back from the body shop and looks amazing. All the flaws are corrected and if you didn't know, you'd never know this wasn't a real S Zero. Critically, Mike was able to use a wide variety of auto body saws to notch the panel beam where the window trolley was contacting. He decided to leave the beam to continue to provide some (although reduced) support to the outer panel skin. You can see the notch below. Notice the dark red steel pipe above it- this is the door intrusion beam and is what protects you from a side impact. This tube was changed to an extruded heavy bar in the 1994 NSX. Now I can finally begin a proper driver side window glass alignment.

20240505_133502.jpg

Notice the Super Lube silicone grease still on the regulator guide. This was a good sign that I chose the right grease for the windows. Imagine my surprise when the window barely made it up. We had a problem. After running my finger in the channel, instead of clear silicone grease, my finger was covered in a goo comprised of small metal filings. It seems all the metal cutting threw off aluminum shavings that got stuck in the grease. The door was full of it.

You can see on the red rag below that I spent about an hour cleaning the contaminated grease out of the window guides and regulator guide. I then re-lubed with more Super Lube. The good news is that cleaning is much easier because the silicone PTFE grease does not harden into a JB-weld like crust like the OEM stuff does. I was able to wipe it all out and put fresh grease in relatively trouble free. The front window guide had almost no metal but the rear guide was full of it.

20240505_133427.jpg

Even with clean rails and fresh grease, the window was still very slow going up. I started the car and with 14.5V, it worked much better, but not great. I felt the motor housing and it was almost too hot to touch- that's the sign of a failing regulator. This is the risk of re-using 30-year old components. It was decision time. Do I keep the door apart, order a new regulator and wait to install? Or do I button it up and drive until it fails? I chose drive lol.

The window alignment process is tedious. First, you must use the regulator and rear window guide to get the glass to line up roughly fore<-->aft. What you're aiming for is the curvature of the glass to match the curvature of the A-pillar trim piece. Then, using the window stoppers, adjust until the glass contacts the rubber trim just under the A-pillar trim. Be careful- too high will contact the body and shatter the glass! Here's where my stoppers ended up.

Rear:

20240505_133445.jpg

Front:

20240505_133452.jpg
Once the window is lined up with the body, you adjust the in <--> out using the adjustment bolts until the glass contacts the rubber trim with a good seal all the way around. Finally, you adjust the sashes with the bolt to match the angle of the glass. The shape of the window glass is a 3D shape, so adjusting one area moves all the others. Eventually, you will get a good fitment.
 
Window Alignment 2

I decided that when I get the new regulator, I'm going to pull the window glass and re-clean and grease the entire system to fully eliminate any metal contamination. I really wish Honda would have re-designed the regulator to something stronger- they are underpowered even when new and it's one of the things about the car I wish they had updated better. Until then, it's time to enjoy my NSX. :)

Mike did a great job removing and preserving the membrane. Just a few small rips to address and then back on.

20240505_161640.jpg

One trick to ensure good fitment of the membrane is to mount the door handle first to make sure doing so later doesn't pull the membrane away from the caulk. Pick a few alignment points, stick them to the door and then install the handle:

20240505_163701.jpg

Then remove the handle and continue sticking the membrane. Feed everything through. Here are John's really nice titanium door lock knobs:

20240505_163715.jpg

20240505_161622.jpg

All important screws. Probably mixed up and/or missing on your NSX. Remember the metal ones go in the plastic and the black ones go in the metal frame.

20240505_161625.jpg

I finally get to place the Ultrasuede cover behind the door handle after all these years. Waited 5 years to do this.

20240505_170601.jpg

Job done.

20240505_170557.jpg
 
Last edited:
I have to say, there is a wealth of information in this build. Thank you for documenting as it will be a great help for future nsx owners. Fantastic job!
 
General Update

Finally had a weekend with (relatively) nothing happening, so I took the time to wash the car. I've been driving it to work almost every day lately with the nice weather, so there's a good layer of pollen and road grit on it. I didn't scrub at all, just wet the car down, sprayed on the Mr. Pink foam, let it drip off and then rinsed. The PPF makes it so easy. My daughter cleaned the wheels with some PS-21 wheel cleaner (I love the smell). I dried the car with some Turtle Wax Hybrid Ceramic spray wax- I really like this stuff. No pics because my phone was dead lol.

I need to get the car in the air to fix the oil pan shield and re-clock the motor mounts. Then, it's time to remove the gauge cluster for calibration. I've been dreading it because it means removing (and likely breaking) my brand new knee bolster. While I'm in there, I'm going to replace the turn cancel unit and properly install the Momo Type-S horn button, since Spencer and I both forgot how to mount the ring and it's kind of kludged in there right now.

I'm still waiting for my replacement lower rear ball joints from Hardrace- they're supposed to ship this month. My right one is toast- the shaft is bent. @Big McLargeHuge spent like an hour cranking on the nut just to get it installed. I'm going to try and drive the car all summer and do that job in September before NSXPO. I'll also replace both rear wheel bearings at the same time.

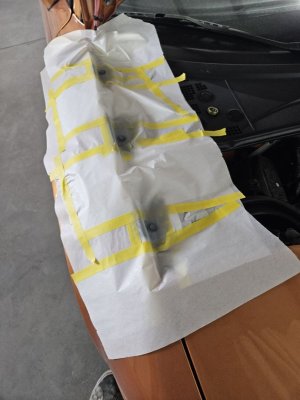
Finally, I ordered some CF side scoops from ATR- Christian's part fits very well and has the factory offset spacers. Mike has some leftover Imola paint from the body bolts, so he'll shoot them and we can fit them on the car before XPO.
 
Side Scoops

1000022043.jpg

The carbon side scoops from @austrian type-R arrived today. The build quality is miles better than the Route KS version currently on the car. The carbon weave is motorsports quality. The weight difference is astounding- it feels like holding a piece of printer paper. Two things I noticed though:

1000022045.jpg

They came without the rear mesh. In truth, this will help me, as Mike spent a lot of time carefully masking the mesh when he painted the Route KS scoops. Thus, these will require far less labor to paint. I bought some of this and will make my own mesh. There used to be a DIY in the old FAQ about this job, but I haven't had the time to restore the FAQ to the new forum...
1000022044.jpg

They also came without studs! It looks like his fabricator JB welded some captive lock nuts to the CF body. I'll find the appropriate screws at Ace Hardware, cut the heads and add them with some more JB Weld to reinforce the area.

Alas, another mini project for the car... I don't mind. Now that it's together and driving, these little jobs are just a fun part of the hobby for me.

Pics upcoming when I get home from work.
 
Last edited:
Back
Top