Window Upgrade Day July 10th

Joined
11 February 2000
Messages
7,112
Location
Half Moon Bay, CA, USA
Hi all, here are the details for the July 10 window upgrade day:

Let's start at 11 am as this should beat most of the beach traffic coming over the hill to HMB and give us time for a nice lunch at Cameron's when we're done.

You will need:
1. 10 mm open/box-end wrench
2. 10 mm ratchet
3. Phillips screwdriver #2 tip
4. Large standard screwdriver
5. Urea grease (or your favorite grease)
6. Wide tape to secure window in raised position
7. Brake cleaner spray
8. Rags

As I mentioned before, I have decided to purchase 5 extra kits from Hugo. If you are not handy but want your windows fixed, PM me and I will work out a deal with you to do your car for you. One kit is already sold.

So far the list of attendees is:
1) baynsac
2) smooth
3) REDNSXT
4) juejaimon
5) Joshs
6) Ashik
7) MikeC_587
 
Last edited:
So far the list of attendees is:
1) baynsac
2) smooth
3) REDNSXT
4) juejaimon
5) Joshs
6) Ashik
7) MikeC_587
8. CharlesCA

I have only two kits left!
 
Anyone wanna meet up at Bridge Point in San Mateo before heading over to Ken's?
 
Hi Ken, I would like to participate and would like to purchase one of your extra kit.

Thanks,
Larry
 
Ken,
Can I come by just to hang out?:biggrin:
 
If I read correctly they are meeting at Brigepoint in Foster City Just dont know which Store but I am going to Kens and I can meet you there by home depot if you like. around 10:30
 
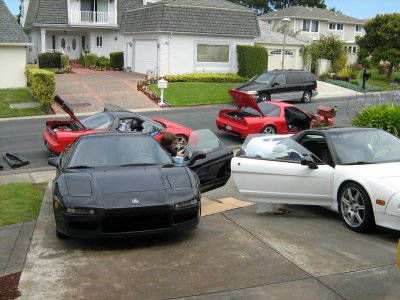
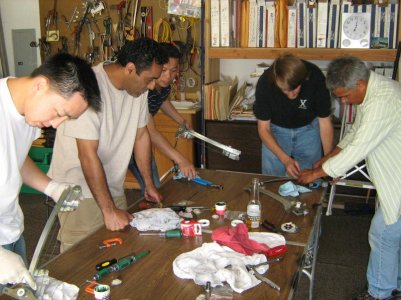
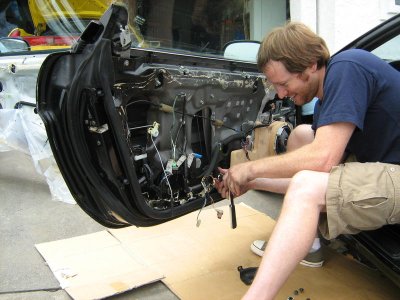
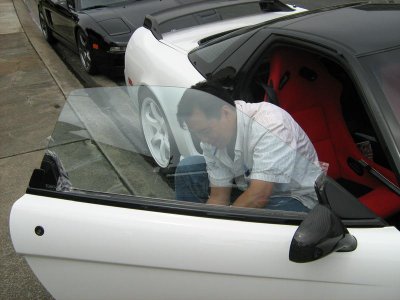
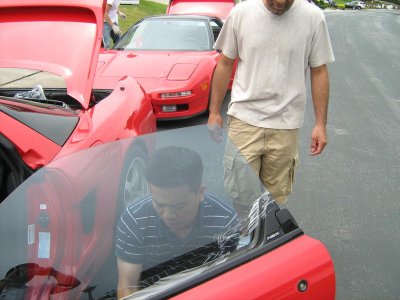
It was a pretty productive day today! Good to see you guys.
 

Attachments

  • IMG_0853.jpg
    IMG_0853.jpg
    90.5 KB · Views: 136
  • IMG_0851.jpg
    IMG_0851.jpg
    97.9 KB · Views: 148
  • IMG_0860.jpg
    IMG_0860.jpg
    78.8 KB · Views: 147
  • IMG_0843.jpg
    IMG_0843.jpg
    56.8 KB · Views: 137
  • IMG_0858.jpg
    IMG_0858.jpg
    69.8 KB · Views: 135
Ken,
Thank you for the great hospitality today. The retrofit took a little longer than anticipated but a lot of our windows are now working smoother, faster, and should last a lot longer too. See you at the next meet.
 
Big thanks to Ken for hosting us all and helping us out!

Here's a before and after:

Before:

<object width="640" height="385"><param name="movie" value="http://www.youtube.com/v/65CuXcZlEJE&hl=en_US&fs=1?rel=0"></param><param name="allowFullScreen" value="true"></param><param name="allowscriptaccess" value="always"></param><embed src="http://www.youtube.com/v/65CuXcZlEJE&hl=en_US&fs=1?rel=0" type="application/x-shockwave-flash" allowscriptaccess="always" allowfullscreen="true" width="640" height="385"></embed></object>

After:

<object width="640" height="385"><param name="movie" value="http://www.youtube.com/v/BSBi2undJP4&hl=en_US&fs=1?rel=0"></param><param name="allowFullScreen" value="true"></param><param name="allowscriptaccess" value="always"></param><embed src="http://www.youtube.com/v/BSBi2undJP4&hl=en_US&fs=1?rel=0" type="application/x-shockwave-flash" allowscriptaccess="always" allowfullscreen="true" width="640" height="385"></embed></object>
 
Well it was nice to finally meet Ken, and it was really nice of him to host the window regulator fix it day :smile:

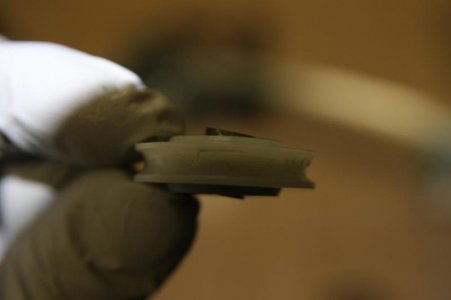
I used Hugo's fix it kit on my passenger window the day earlier, and was going to do my drivers side on the fix it day, but I wasn't too happy with the quality of the roller that replaced the original plastic guide, so I wanted to see the other kits before I did the driver's side. I thought that maybe I got a bad set of rollers (they appear to be all the same, after seeing others).

The window was much faster, but the bearings and shaft on the plastic roller that came with the kit had a lot of play in it and was getting bound up a bit when it was turning. That being the case, it was not a smooth rotation and it was noisy! (similar to the popping noises most of us hear with the factory setup that has degraded)

The angle of the cable on the roller and the fact that the roller shaft and bearings had so much play was the cause of the binding. I noticed this after assembling the regulator with the kit parts. When I manually moved the window mount on the track, I could see the plastic roller riding up little and then coming back down, emitting popping noises. You can hear the noise in the "after" vid that Joshs posted above.

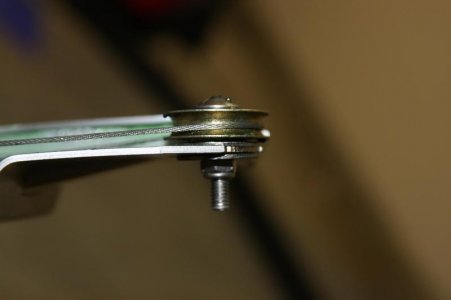
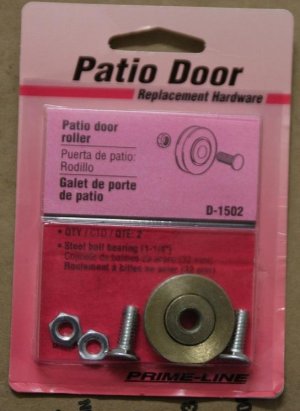
Anyway, I replaced the cheapo plastic roller that came with the kit with a metal roller with a sealed type bearing, and now it's working perfectly! Fast and noise free (that was to goal, as my windows were slow and getting more noisy).

There are plastic rollers with sealed type bearings available as well, but I though I'd give the metal roller a try. If you want to do this, you can use everything in the kit, minus the plastic roller and top washer. The metal roller is a bit bigger but it fits perfectly. I don't have it in the picture, but you can still use that top piece with the tabs that go over the roller.

BTW, you need to have a really tiny C clamp to hold the bottom cable gear in place, so you can easily put the top cable gear in place. It's hell doing it without one (I tried, I know :redface:) plus that's the only way you can get proper tension on the cables.
 

Attachments

  • side_plastic_roller.jpg
    side_plastic_roller.jpg
    15.1 KB · Views: 112
  • metalroller_cable.jpg
    metalroller_cable.jpg
    18.3 KB · Views: 113
  • metal_roller.jpg
    metal_roller.jpg
    42.3 KB · Views: 122
Last edited:
Ken,
My driver side is moving up faster now compare to yesterday, about the same as the passenger side, maybe the components just need exercising.

Josh,
Great videos.

Tariq,
Thanks for giving me a hand yesterday. Mine don't have the roller noise, or they're not noticeable since I clamped down the rollers a little tighter and reduced that travel gap. Great find on the metal rollers.
 
Last edited:
Tariq,

It sounds like the metal rollers is the way to go. Where did you buy them at?

Thanks,

Mike
 
It's very gratifying to see you all fitting my kits in your windows, wish I could be there to help you guys or have a beer with you:biggrin:

smooth: you are the first and only one to have reported a defect on the kits!!
I used 1mm gap to allow the roller to tilt, that was on purpose, because the cable angle depends on the lever position, it is not fixed!! you can check it in your 2nd pictures, cable is not aligned with your roller :wink:
A smaller stainless steel roller would prevent it from rusting after a few years and you could still use the top washer, your only protection now is the cable tension itself:confused:

The "cheapo" plastic roller was never my intention, I just searched for the most similar roller to the OEM S2000 one and used the best and most expensive materials I could, all metal parts of the kits are in stainless steel to prove it.

All feedbacks are important, especially negative ones as they could help to improve or correct defects, but I still prefer my stainless-steel-top-washer-protected-tilting-plastic-roller in this case:biggrin::biggrin:

Anyway, I am glad you found some alternative solution and that you are happy, that's the most important!

Thank you Ken for organizing that day!
 
I cool to see all of them getting together to do your upgrade Hugo.

did you ever think about the effects you would have on other when designing this upgrade? it must feel good to know your effects are Great.

Again great job Hugo.
 
Back
Top