• ***AVOID MARKETPLACE SCAMS!!***

    Scammers are using compromised Prime member accounts to pose as a trusted seller in the marketplace. Before you enter into a deal with any seller, follow these tips to keep yourself safe. If you encounter one of these scammers, please report them immediately and we will lock their account.

    Caveat Emptor!

Group Buy Vinyl Wrap

Status
Not open for further replies.
+1 I'm hoping he can show some kind of demo or if the very least tell us where's a good place to make those cuts.

Agreed.

Note, I have seen demo videos, but most lack detail or only show it on "mostly" flat surfaces. I haven't seen any videos showing one of the hardest areas of the car, which would be VERY educational to me.

Also, is the logic to do one giant sheet per panel on the car??
 
<object style="height: 390px; width: 640px"><param name="movie" value="http://www.youtube.com/v/Qbncpuzq7cc?version=3&feature=player_detailpage"><param name="allowFullScreen" value="true"><param name="allowScriptAccess" value="always"><embed src="http://www.youtube.com/v/Qbncpuzq7cc?version=3&feature=player_detailpage" type="application/x-shockwave-flash" allowfullscreen="true" allowScriptAccess="always" width="640" height="360"></object>
 
I never realized it took that long to do the vinyl. Thats for posting the video.
 
Long? I guess. Thanks for posting that video as well. It may take some time but for the price to change the color of your car or in my case saving me paint work this is well worth the time.

I never really thought about the process thats all. Only thing is when you open the door or pop the hood. But if you ever want to go back you can.
 
I never really thought about the process thats all. Only thing is when you open the door or pop the hood. But if you ever want to go back you can.

The doors I think you can wrap the inside, but I don't know. If you can it's probably pretty hard.

When you pop the hood or trunk yeah, that could be an issue.

The only thing that would concern me is the engine bay if you have no cover, but if you have a black car or a white one and wrap a different color I think it would actually look pretty good.

Yes you can wrap the door jambs. Seen it on most of the expensive jobs. As far as the hood goes I guess if you really wanted, one could spray that part of the car. But then again, I don't have my hood up that often.
 
Two questions I have:

1) how does the gloss vinyl look compared to a paint job? Is it as shiny?

2) what is removal like later? Is it likely to pull paint off around any chips or edges?

I am considering a wrap on more than one of my cars but would like to know more first.
 
Two questions I have:

1) how does the gloss vinyl look compared to a paint job? Is it as shiny?

2) what is removal like later? Is it likely to pull paint off around any chips or edges?

I am considering a wrap on more than one of my cars but would like to know more first.

1). The gloss material is very shinny. It will not be as "deep" as a basecoat/clearcoat paint finish.

2). Oracal indicates a 4 year safe removal and 10 year UV protection. That being said, If you car has been repainted or repairs done, it is possible for the material to pull off a painted finish if it was not bonded correctly to the below layers. I saw is happen on my mirrors (plastic) when I pulled the Invisiguard off last summer. I noticed if you put the area in the sun on a warm day, it comes off much easier. I would think the "wrap" vinyl would be similar.
 
Last edited:
Can I buy Matt black for hood, roof and trunk? And rest of car white Matt.
If I can then how much do I need to buy.
 
Can I buy Matt black for hood, roof and trunk? And rest of car white Matt.
If I can then how much do I need to buy.

3-4 yards black for (Roof, Hood, Deck Lid)
9 Yards white for the rest.

Let me know if you want that set up, I can put on on the list.
 
how much will i need for a full wrap (pop-up head lights, jambs, under the trunk and hood)?
 
Last edited:
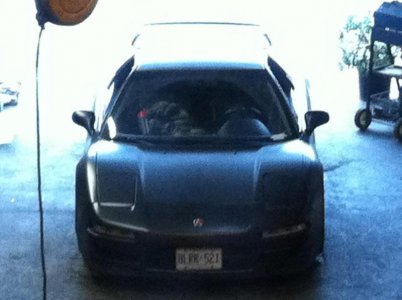
Did mine in the oracal matte black. All I have to say is I would never want to wrap neither bumpers ever again. By the time you get the the rounded edges there is so much material/wrinkles that you have to overstretch the material just to get rid of it. When the material is overstretched is becomes a little bit glossy, so the less stretch you have, the better it will look.

I suggest doing this with a partner especially if it's your first time.

And expect to waste a little more yards than the norm. (I used about 14-16 yds)

Goodluck !
 

Attachments

  • 382598_10150449799601869_505651868_10363733_1958810083_n.jpg
    382598_10150449799601869_505651868_10363733_1958810083_n.jpg
    49.1 KB · Views: 208
Did mine in the oracal matte black. All I have to say is I would never want to wrap neither bumpers ever again. By the time you get the the rounded edges there is so much material/wrinkles that you have to overstretch the material just to get rid of it. When the material is overstretched is becomes a little bit glossy, so the less stretch you have, the better it will look.

I suggest doing this with a partner especially if it's your first time.

And expect to waste a little more yards than the norm. (I used about 14-16 yds)

Goodluck !

Better pictures please......
 
I will post some pictures later today.

I think part of the reason it was so hard was because I did the upper bumper in one piece (don't know how people use multiple pieces without obvious seams). If you can, start form the middle of the bumper and work your way outwards. Be careful not to use too much heat or you will over heat that area and cause it to become glossy. Throughout the whole process I found that using my blow dryer on low heat + high speed was a lot better than high heat + low speed. Dont forget to spray each section that you are working on with a 50/50 mix of 100% Isopropyl Alcohol & Water.

Be patient! Although the air release channels help with getting rid of most small air bubbles (simply press them out with your finger), if you try and press out an air bubble that is too large, you may run the risk of making permanent marks or creases in the section. This happened to me quite a few times but I know better for next time. As someone mentioned, the vinyl is able to be repositioned many times (more risk of dust getting under though) so don't be scared to pull of the sections that have too many bubbles and wrinkles.
 
Last edited:
Dont forget to spray each section that you are working on with a 50/50 mix of 100% Isopropyl Alcohol & Water.

I thought that you were able to skip this step with this material? About what ambient temperature approximately was it when you did this?
 
I thought that you were able to skip this step with this material? About what ambient temperature approximately was it when you did this?

I think he meant cleaning the surface of the car before application.
 
Only a couple more days till I close this group buy. Please, if you are not on the list on the opening post (I have spoken to many people) and want to order on this group buy send me a PM so I can finalize the list.
 
Only a couple more days till I close this group buy. Please, if you are not on the list on the opening post (I have spoken to many people) and want to order on this group buy send me a PM so I can finalize the list.

How much for material that would support complete wrapping of a stock 2002 NSX T?
 
I will post some pictures later today.

I think part of the reason it was so hard was because I did the upper bumper in one piece (don't know how people use multiple pieces without obvious seams). If you can, start form the middle of the bumper and work your way outwards. Be careful not to use too much heat or you will over heat that area and cause it to become glossy. Throughout the whole process I found that using my blow dryer on low heat + high speed was a lot better than high heat + low speed. Dont forget to spray each section that you are working on with a 50/50 mix of 100% Isopropyl Alcohol & Water.

Be patient! Although the air release channels help with getting rid of most small air bubbles (simply press them out with your finger), if you try and press out an air bubble that is too large, you may run the risk of making permanent marks or creases in the section. This happened to me quite a few times but I know better for next time. As someone mentioned, the vinyl is able to be repositioned many times (more risk of dust getting under though) so don't be scared to pull of the sections that have too many bubbles and wrinkles.

Any updates on close ups for the photos?

I think A LOT of people are holding out due to the lack of photos and feedback from amateurs doing this project as a true DIY with outstanding results. That's my hesitation.

The more information that is available (with DETAILS) and I mean CLOSE UPS and walkthroughs on some of the key tough spots, the more incentive I have to try this.
 
Status
Not open for further replies.
Back
Top