Pursuit of Childhood Dream Car

Joined
4 December 2014
Messages
376
Location
Houston, TX
Alright everyone, this is my attempt to consolidate things into a single build thread. In retrospect, I should have taken more pics, oh well. To make this build a little different…I will attempt to help others by walking people through my thought process in the decisions I made with my NSX.

Also, I want to point people to the specific threads and other forum members I drew inspiration and assistance. After lots of research on prime, I have found it to be full of knowledge and experts. However as a new owner, it was often overwhelming and I found that I could not read enough and couldn’t hope to learn enough quickly enough along the way. Hindsight is 20/20 and you don’t know what you don’t know until after doing things…so here we go.

Pursuit of Childhood Dream Car

Initially my sports car search began with the new C7. Rented one for the weekend and loved it. In the back of my mind though, I figured while an awesome car, it would be too common for my taste and I really didn’t want to eat the depreciation. Next, I looked at used BMW 1-series and S2K. I almost pulled the trigger on both. But something was still missing. Then the light bulb finally came on. As a child of the 80’s and of video games like Gran Turismo, the car I dreamed about was the NSX.

At this point it is important to do your typical market research and hit up the forums. I also knew before going any further. I needed to see, feel, and drive one first hand. As I am 6’1” and 215 lb. It was important to know that I could fit comfortably and that I would not be let down by meeting my idol. Hence the craigslist search for nearby NSXs and test drive. This little bit of time spent upfront, convinced me to move forward with my search. Full steam ahead!

Next, it was important to set the ethos of my purchase and determine my fixed parameters of my search.

Ethos: Buy the best condition, clean titled, well documented original car I could afford. I knew I was not looking for a track car, daily driver or salvage. I also would accept modified like SC, but I did not want anything too drastic or irreversible and original parts had to be included. Also I was pretty flexible on color. Personally, I did not mind spending more upfront and having to save up to do personalizing down the road piece by piece. I wanted the best starting point.

Fixed parameters: 97-01 as I wanted those sweet pop up lights, targa and NA2.

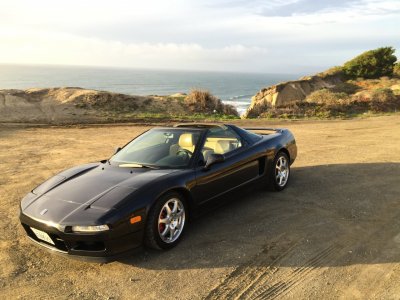
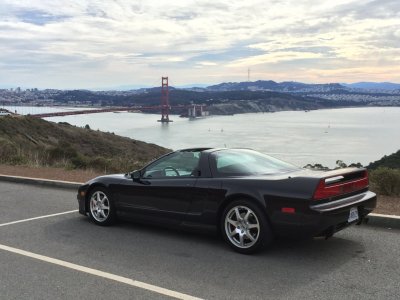
After searching for an unbelievably short 2 weeks, a car came up in California that fit the bill, 2000 NSX-T. Apparently that is crazy rare time frame wise. Most people search for months or years to find the right car. So have your $ ready to go and be ready to close a deal and travel at a drop of a hat. I was ready, flew out there, checked the car out, bought it and had it transported home via enclosed transport back to Texas.

Transport – There are plenty of transport companies, but when you are shipping something for the first time, I figured I would save myself the grief and not worry about a few dollars extra and use a bigger name company. If you can’t trust Hagerty to sort out reputable companies then how the heck would I do it myself?
http://www.hagerty.com/articles-vide...g-your-classic


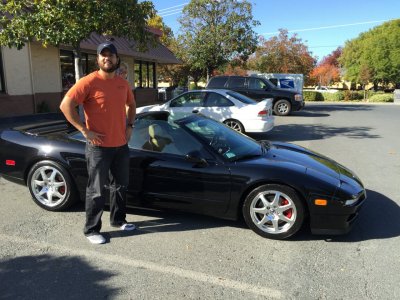
A few pics from picking the car up.

attachment.php
attachment.php
attachment.php
attachment.php
attachment.php
attachment.php


Sorting the car out

Maintenance was well documented with the 2 big items (water pump and timing belt) already completed by previous owner. So I found my area’s local Houston NSX guru for a full inspection and came away with a clean bill of health.

C&M Honda – ask for Carl (NSX guru)
http://www.cmcarspecialist.com/


Next, I wanted to get the car fully OEM. My car was really close already with the only non-OEM parts being improvements:
Bilstein struts on lower perch
25mm spacer on rear hubs
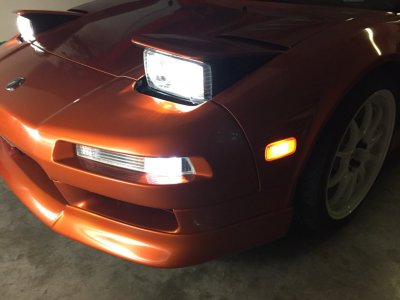
HID headlights
SOS stealth license plate bracket

So all I needed to do was fill the missing small details:
Targa Plugs - ordered from Acura
Trunk Mat - took a year of searching till a fellow Primer put one for sale
Toolbox – missing screwdriver and pressure gauge (ordered from Acura)

Personalization

I did my best not rush into mods and tried to research and see what other have done to inspire my build. While I still think there is more I want to do, below is a quick summary of my current mods in the rough order I proceeded:

Taillight fix to prevent condensation
Repair OEM Bose amps and speakers
Zublin Smartenna
Grom
Cupholders
Cabin Air Filter
JDM Switch Panel
Rydeen Mirror + Cameras
Valentine 1
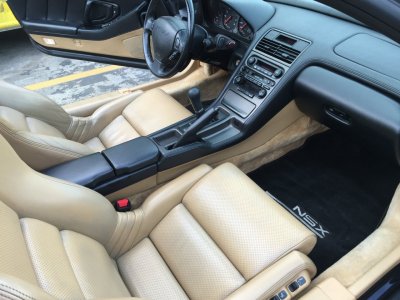
Heated Seats + shave seat cushion for tall driver
LED Light Kit from Ikonikled (Interior/Exterior)
Secret Switch
Window Auto-Up
Hugo’s Window Fix
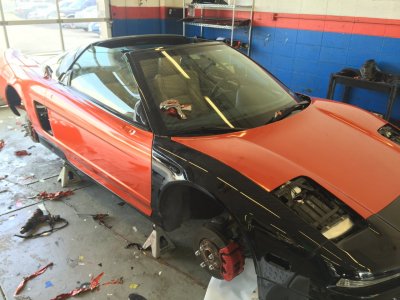
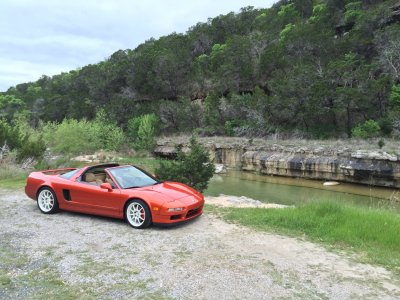
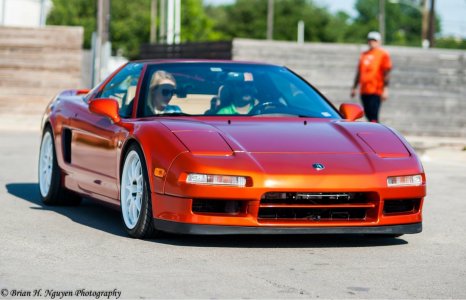
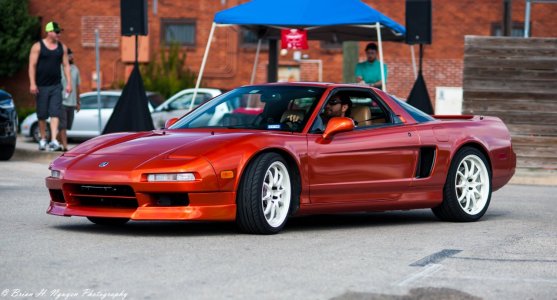
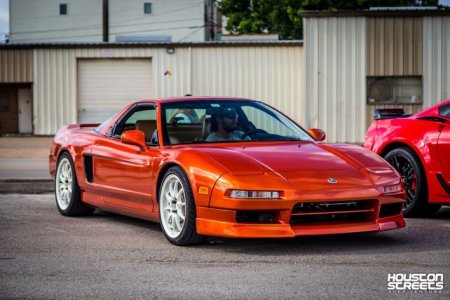
Fiery Orange Wrap
Engine Intake Grills
Pride V2 RFL Exhaust
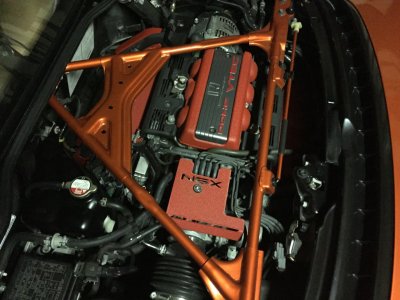
Engine Cover Removal
Targa Top Storage
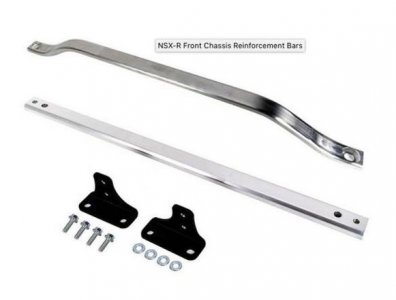
Chassis Reinforcement – NSX-R Front Upper & Lower Bars
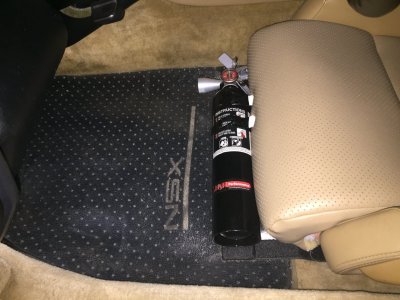
Fire Extinguisher + Mount
“Titanium” Monel Key
Volk CE28N in 17/18 - White
Seatbelt "Acura" Cushions
Throttle Body Cover
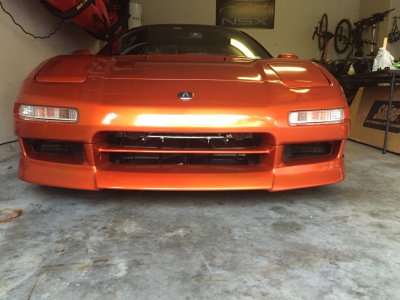
Front Lip – Wingswest
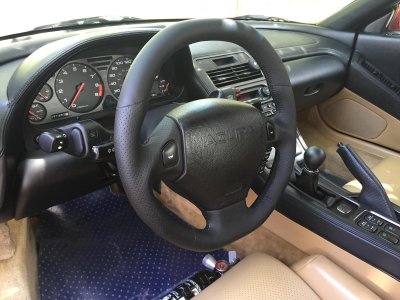
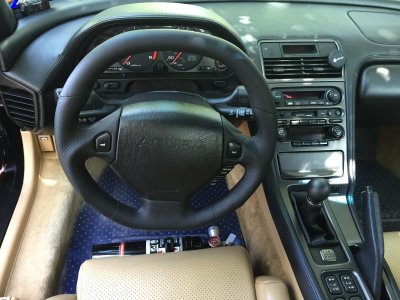
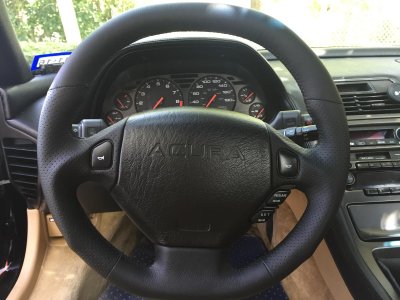
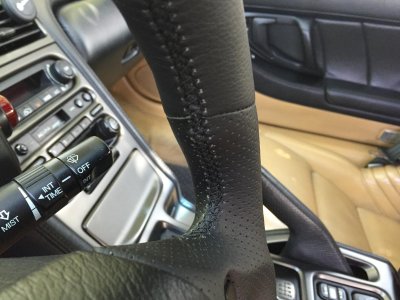
Steering Wheel
TBD...$$$

More details on each of the above mods will in posts below.

So after 1.5 years of ownership I am just as much in love with my car as when I bought it. In fact, I appreciate it more now as a marvel of engineering and timeless design. This will be a car I hand down to my kids. Not sure what I will do next, but I will let the next mod find me.

Also, I want to say thank you to all the Primers who gave advice to a newb and had the patience to help me find my way. We all have such a passion for these cars and it really shows thru the strength of the community. I feel fortunate to have met a lot of great new people thru the community and hope to help out as my knowledge grows.

Adios,
Javier
 

Attachments

  • 4.jpg
    4.jpg
    226.2 KB · Views: 1,426
  • 1.jpg
    1.jpg
    320.1 KB · Views: 1,454
  • 2.jpg
    2.jpg
    254 KB · Views: 1,414
  • 3.jpg
    3.jpg
    194.3 KB · Views: 1,420
  • 5.jpg
    5.jpg
    153.9 KB · Views: 1,418
  • 6.jpg
    6.jpg
    135.7 KB · Views: 1,408
Last edited:
A fine build thread and a very useful reference for any new owner. Congratulations on a fine job.
 
Nice build thread. Looking forward to the updates.


Did you get your wheels from someone in socal? They look very familiar. ;)
 
A fine build thread and a very useful reference for any new owner. Congratulations on a fine job.

Appreciate it. You know everyone always says to all the newbies that search is your friend...but if you don't know what your looking for your just out of luck. Just wanted to help at least get people started with ideas and then search really is your friend.

I am a big fan of your thread detailing a "full" wrap. Looks great and really shows the potential.

Nice build thread. Looking forward to the updates.

Did you get your wheels from someone in socal? They look very familiar. ;)

Yes, I did. Where these originally yours? If so, what did you throw on instead?

I was actually looking to pick up a set so I could refinish a al Mexiracer's machined look CE28N. Those look so sweet on his blue car. However, once I got to thinking about it, the white goes with the orange wrap and goes with the black accents. Looks really good. Even if I take the wrap off the white will still work with my black car. Just turned out to be right deal to pounce on with no wait time.


Going to dig around for some more photos. As far as what is next...I am contemplating building along the NA route or going to FI. So many things to consider, I am going to take my time with that decision.
 
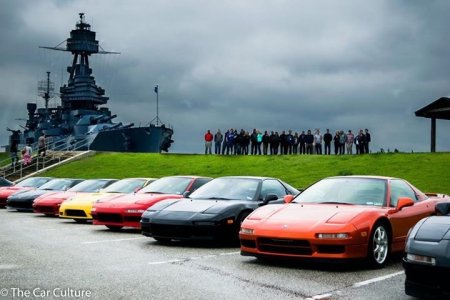
Saw it at Coffee and Cars recently and it looked great. Was going to stick around and chat but I had to rollout pretty early.

Thanks for including links also. You've given me some ideas.
 
Saw it at Coffee and Cars recently and it looked great. Was going to stick around and chat but I had to rollout pretty early.

Thanks for including links also. You've given me some ideas.

Thanks, too bad we missed each other. Good luck with the mods!

Very nicely done and I appreciate you including the links!

Thanks, just trying to pass along help that others so kindly gave me.


I recently uploaded some additional pics to help fill in the thread and I decided the next mod... steering wheel. I picked up a used OEM wheel with airbag from another primer and sent it off to be modified. Since my original wheel was in such good order I just couldn't justify cutting it up. I will put that one in storage. The new one will be:
Flat top (no center stripe) & flat bottom in smooth leather
Side sport grips in perforated leather
Black leather with black stitching

I am using a company I found out in Cali that typically does Corvette wheels. If it turns out as good as their samples, then I will give them a shout out here with the name, price, and lead time. I should be getting it back soon. Here is a sample pic of kind of what I want, just no carbon and all black leather instead.

attachment.php
 

Attachments

  • C7FLATTOP-546x497[1].jpg
    C7FLATTOP-546x497[1].jpg
    30.6 KB · Views: 1,696
Last edited:
Nah, those wheels weren't mine but a friend of mine. I almost picked them up before but I ended up going with other wheels.

Looks great!
 
I like how this car keeps progressing. I remember it when it was black without the volks, and it keeps getting better and better. As for the white wheels, I'm a fan, with orange wrap or when back to original black, both would look great.
 
Thanks for comments.

Well, I got a status update on my steering wheel...about 1 week before I get it back. Excited. Will post about it. Also need to read the steering wheel and airbag removal/install instructions for our cars.

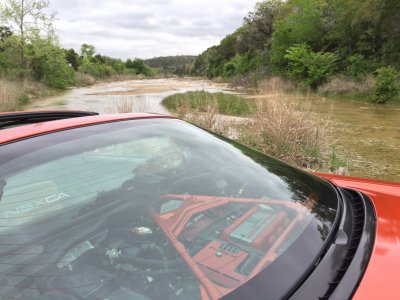
In the meantime, I got fed up with the crazy Texas heat and had a tint done. I had "3M Crystalline" installed with 90% on front windshield and 50% on side and rear hatch. My reasoning for only going 50% was I do drive at night and wanting to still see the engine while having it still match the sides.

Noticed a huge difference on cabin temp and comfort right away. Also doesn't block my radar detector as the film is non-metallized. I think it turned out great and would recommend it. Especially now that you can get tints that perform well without being really dark.


thumb


thumb


thumb
 
Dang.... For some reason I'm getting the little blue [?] box on 90% of the pics you posted???

Could be my iPad :confused:
 
Dang.... For some reason I'm getting the little blue [?] box on 90% of the pics you posted???

Could be my iPad :confused:

Your right, my pics are not showing up. I will see about reposting.
 
Taillight condensation

As many of you are aware over the years our taillight assemblies have atendency to gather condensation inside the lenses. This often causes a warninglight on your dash. There are several potential reasons or combination of itemsto check: taillight gaskets, clogged water drain holes/paths and taillightenclosures no longer holding watertight seal with lenses.
The fixes are straight forward and easy for a beginner. I ultimately replacedmy taillight gaskets, cleaned the drain paths, resealed with enclosures withsilicone and drilled hidden drain holes at bottom of lenses. I have beentrouble free ever since.

See these links for more in-depth explanations:
http://www.nsxprime.com/forum/showthread.php/187246-Fixing-condensation-in-taillights-and-trunk
http://www.nsxprime.com/forum/showthread.php/96532-Fix-for-Tail-lights-Leaking-Any-ideas?highlight=taillight+drill+condensation

 
it's unfortunate most of your pictures don't show up for me

Sigh, Prime or my browser is giving me all kinds of issues. Posting has been a huge pain with error messages. I am going to try and post each mod as its own post.

- - - Updated - - -

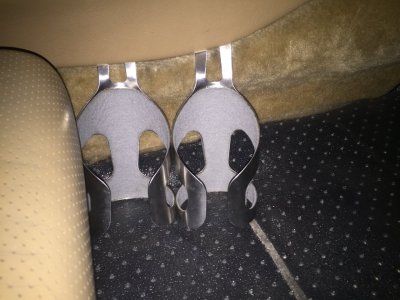
Cupholders

I am sure we all can agree that our cupholders are laughably inadequate in size
and location. I like others have removed them. As such, there are many
home-made and aftermarket solutions. My personal favorites are the ones found
below. The advantage is they are well made, look good, easily accessible, stay
put, removable, adjustable to fit any size drink and you don’t have something
hanging off your dash or handbrake. I bought two and have them on the passenger
side.

http://www.ultimatecupholders.com

attachment.php


- - - Updated - - -

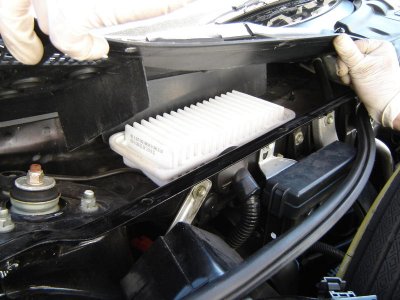
Cabin Air Filter

Many will notice that outside particles collect quickly inside our cabins since
our cars lack a cabin air filter. You can buy the crazy expensive HEPA filter
setup from SOS for big money or the DIY route. I choose the do it the
self-route. Just buy one of the various sized filters from local autoparts
store that fit and drop in place. Done.

http://www.nsxprime.com/forum/showthread.php/191706-Cabin-Filter

http://www.nsxprime.com/forum/showthread.php/94032-DIY-In-Cabin-Air-Filter-*solved-with-instructions*-cost-10?highlight=cabin+filter

attachment.php


- - - Updated - - -

Engine Cover Removal

I decided to remove the engine cover to lose some weight and show off the
engine bay. This of course led to the realization that damn, I really need to
refresh my valve covers and paint my coolant tank so it does not get brittle
from sun damage. Also dressed up my targa bar as part of my latter Vinyl wrap.

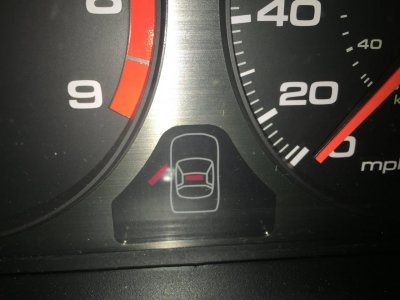
Also, since I had a targa, I wanted to still have my dash warning lights work
that sense if the targa roof is latched on the roof or not. There is a better
explanation in my other thread below on what you need to do.

http://www.nsxprime.com/forum/showthread.php/37331-PROJECT-Engine-cover-engine-hatch-and-Coolant-Bottle-On-the-Cheap?p=1885799#post1885799

http://www.nsxprime.com/forum/showthread.php/194680-Targa-Top-Latch-Warning-Light-and-Sensor-Removing-Clamshell-Engine-Cover

attachment.php
attachment.php


Pride V2 RFL Exhaust

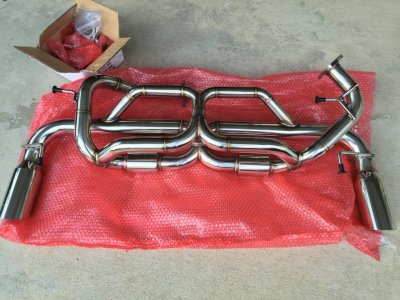
I was looking for something to make a statement. This exhaust makes my stock
car sound awesome. Also half the weight of the stock exhaust. Keep in mind that
you will need the adapter pipes depending on your year. Also the adapter pipes
are known to have issue with one of the bolts being nearly impossible to get
on. I was able to get mine on with great difficulty. Pride needs to do
something about that issue. Otherwise, Pride stuff is beautifully made at
reasonable prices.

http://www.nsxprime.com/forum/showthread.php/188719-NEW-PRIDE-V2-G2RFL-Exhaust!?highlight=pride+exhaust+rfl

http://www.nsxprime.com/forum/showthread.php/140798-removing-engine-cover-no-more-drone

attachment.php


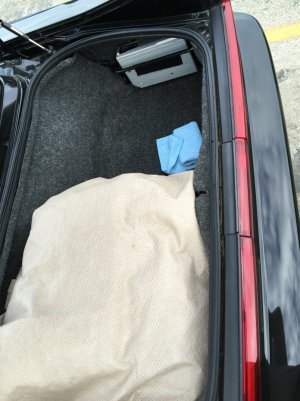
Targa Top Storage

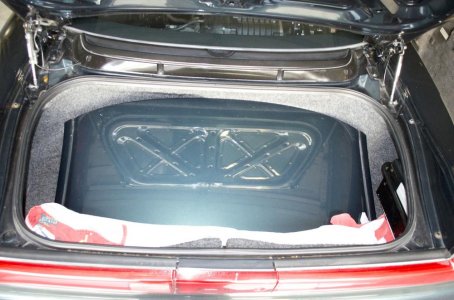
I did not know our tops fit in the trunk. I now keep a blanket in the trunk at
all times to wrap my top in. Also serves as a picnic blanket or blanket on a
cold night for your girl.

http://www.nsxprime.com/forum/showthread.php/177741-Targa-Top-Stowed-in-the-Trunk

attachment.php


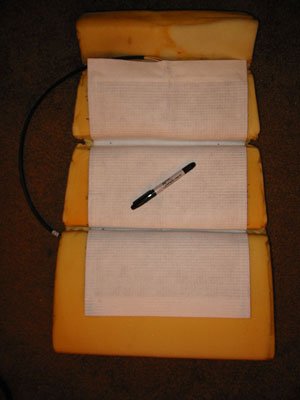
Heated Seats + shave seat cushion for tall driver

If you want to cruise with the top off on cool nights or days I highly
recommend this. Plus your girl will love it and it’s actually kind of nice on a
long trip to occasionally loosen up the back muscles with some heat therapy.

http://www.nsxprime.com/forum/showthread.php/186565-Heated-leather-seats

attachment.php


Zublin Smartenna

This plugs inline between cd changer and head unit and keeps the antenna down
while headunit is on the CD player mode. Otherwise it rises for the other
modes. They don't make these anymore, so you can ask another primer for one,
just unplug your antenna, or put in a short stub antenna. Personally, I like
our long antenna as a quirk of the car.

http://www.nsxprime.com/forum/showthread.php/188324-Need-help-on-potential-audio-set-up?highlight=smartenna+grom

attachment.php


Grom Unit

Provides Bluetooth to our OEM headunits. You can put it directly behind the
headunit in the dash (lots of work to access), behind driver seat (pretty easy)
or in trunk (easiest). I tried the trunk but connection was not very good. I
settled on behind driver seat and it work perfect now and is still easily
accessible. Also the GROM is compatiable with the Zublin Smatenna while the USA
Spec is not. That’s why I choose it over the other. Also, you can hook up a
microphone to the GROM and I decided the best place for me was the driver side
seatbelt by the shoulder. If I had installed behind the headunit instead of
behind the seat, I probably would have run the microphone up the A pillar
instead by the sun visor.

http://www.nsxprime.com/forum/showthread.php/174820-Why-NavPod

attachment.php


Brian K and William’s Electronics - OEM stereo and amp repair

These guys were both quick and very helpful in getting my OEM system working
again.

http://nsxe-repair.com/

http://www.willmanselectronics.com/nsx.htm


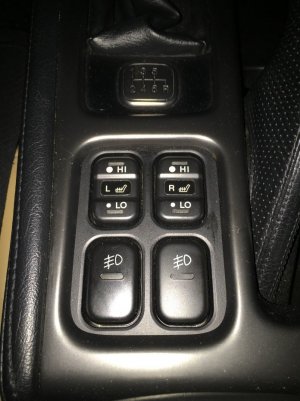
JDM Switch Panel

If you want to add 4 additional buttons to replace coin tray and have it look
factory then this is the way to go. I used the buttons to control heated seats,
radar, and camera. When I did this we didn’t have a lot of options other than
hitting the junkyard, but now SOS sells stuff to make this easier.

http://www.nsxprime.com/forum/showthread.php/196381-JDM-EDM-Center-Console-Switch-Panel-Alternative-Switch-Sourcing

https://www.scienceofspeed.com/index.php/nsx/ipp/interior-accessories/honda-jdm-switch-panel-switches.html

attachment.php


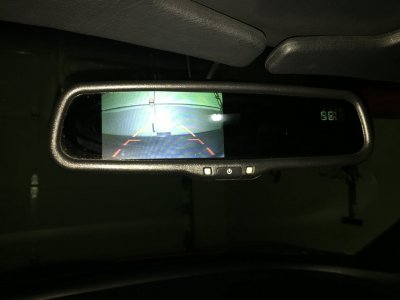
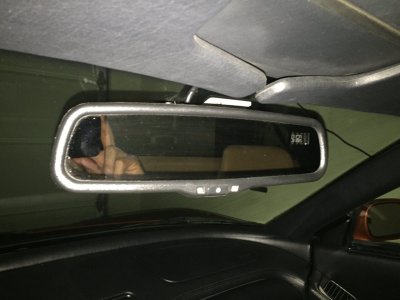
Rydeen Mirror + Cameras

This allows me to avoid putting in a double din or JDM nav pod and get cameras
to see the front and rear view of car. A hidden screen pops up in the rearview
mirror and gives me whichever view I want. Reverse view is wired to my reverse
gear and is automatic while forward is wired to a button on my JDM switch
panel.

http://rydeenmobile.com/

attachment.php
attachment.php


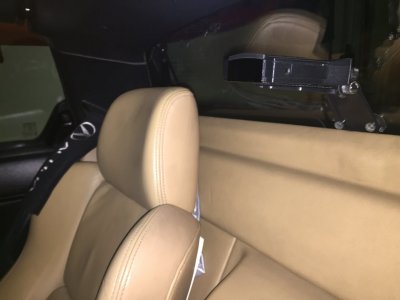
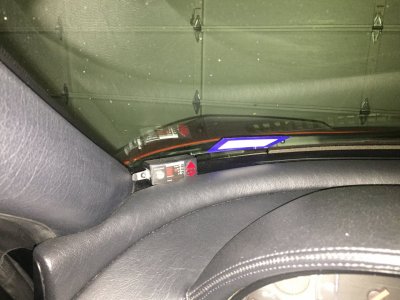
Valentine 1

So many options its crazy. I started with the V1 mounted directly on top of my
targa storage. Worked great with no issues from heat or line of sight plus you
could have your top off and lock the engine bay and not worry about someone
stealing your V1. When I removed the targa storage, I tried fabricating a
bracket to keep it in the engine bay. It didn't work as to much heat now
reached the V1 now that the targa storage was no longer in place reflecting the
engine heat away. So I then moved it to the interior on the back window. You
can buy a bracket to keep it there or Autozone sells a $5 radar mount with 3
suction cups to mount it. Done and easily removable. As far as the V1 hidden
display I used to have it in my ashtray, but the view was not ideal. Eventually
put it in bottom driver side corner of windshield behind my inspection and
registration stickers. It is hidden and gives a great line of sight from that
spot. Plus all the wires are hidden.

http://www.nsxprime.com/forum/showthread.php/170368-Valentine-V1-Custom-bracket-and-Remote-Display-Solutions-for-NSX-owners-Option-A-B?highlight=valentine+1

http://www.nsxprime.com/forum/showthread.php/174820-Why-NavPod?highlight=valentine+1

http://www.nsxprime.com/forum/showthread.php/179087-Valentine-One-Custom-Install?highlight=valentine+1#top

http://www.nsxprime.com/forum/showthread.php/178130-My-Cabin-Technology-Refresh-Project-(picture-intensive!)?highlight=valentine+1

attachment.php
attachment.php


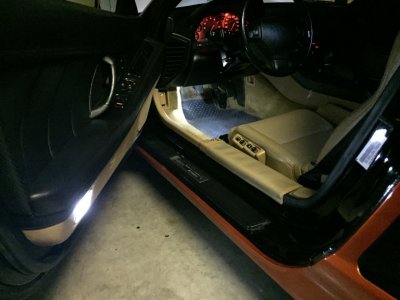
LED Light Kit from Ikonikled

Wow this really did update the interior and the exterior lighting. They
provided great customer service when one of the bulbs was non- functional. No
questions asked and sent out a new one.

http://www.nsxprime.com/forum/showthread.php/177237-NSX-LED-Light-Conversion-Kits-Change-all-the-interior-exterior-lights-to-LED-s

attachment.php
attachment.php


Window Auto-Up

A must do mod and so easy to do to give your driver side window auto up instead
of holding the switch in up position. Note: Our windows don’t have the pressure
safety sensor so if your finger or something gets stuck its going to be bad.
There is also a more in-depth mod for modifying the switch but this easier one
is all I wanted to do and just doing a jumper wire is so simple.

http://www.nsxprime.com/forum/showthread.php/166143-HugaBuga-s-Fast-and-Easy-DIY-auto-up-Window-Mod


Hugo’s Window Fix

Wanted to fix our slow windows and prevent future failures. Now you can buy his
kit and do the install yourself, but I opted for him to do the mod while a
group of us did the easy stuff like pulling and reinstalling the assembly
in/out of car after he did the mods himself. I put together a big group of
Houston guys that wanted this done, so he stopped in Houston on his USA tour.

http://www.nsxprime.com/forum/showthread.php/189322-Hugo-s-Summer-Window-Fix-Tour-Houston-Texas


Fiery Orange Wrap

I am now a big believer in wrapping your car versus repainting. It protects
your original paint from sun and road damage all while giving you a canvas to
do any color you want.

http://www.nsxprime.com/forum/showthread.php/190172-Fiery-Orange-NSX-Wrap?p=1857645#post1857645

attachment.php


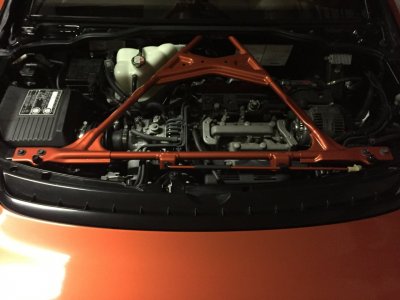
Chassis Reinforcement

SOS NSX-R front upper and lower bars. The lower takes about 5 minutes. The
upper takes significantly longer. You have to remove front bumper or take the
radiator out. I choose bumper which is recommended by SOS in their
instructions. Unfortunately for me the bar did not just bolt right on. It took
forever and lot of cursing to get the brackets, bar, bolts and holes to line up
properly. The fit on mine was so tight, I did not have any room or play. This
is probably different car to car.

I am happy I did this. Instantly could feel the improved tightness and feel of
the car. The flex was reduced and noticeable over bumps and driveways. This
will definitely help in general at speed and cornering too.

http://www.nsxprime.com/forum/showthread.php/193137-What-Suspension-Upgrades-To-Do

attachment.php


Fire Extinguisher + Mount

I was able to find a Dali seat mount and bought a halon equivalent fire
extinguisher. Plan to mount this on the driver side.

http://www.nsxprime.com/forum/showthread.php/193110-WTB-Dali-Fire-Extinguisher-Mount?p=1878071#post1878071

http://www.h3rperformance.com/hg250r.htm

attachment.php


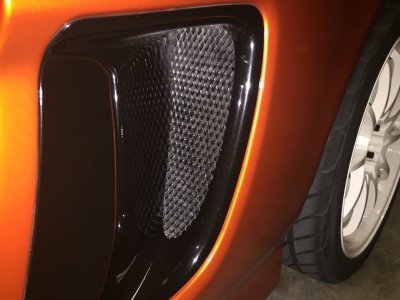
Engine Intake Grills
This is an easy cheap DIY project to update from the old fins to current mesh look. Don’t spend the money buying the aftermarket replacements or the factory options.

http://www.nsxprime.com/forum/showt...ls-my-take-on-how-Honda-should-have-made-them

attachment.php


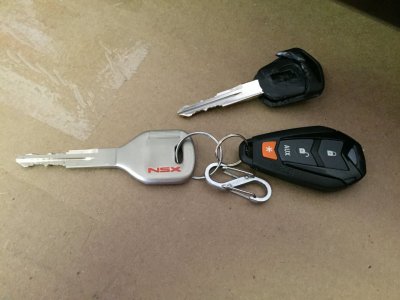
“Titanium” Monel Key

I decided I wanted the cool Monel key to work on my 2000 car. After 97+ they
added an immobilizer chip and went away from the all metal key. So I worked up
this solution.

http://www.nsxprime.com/forum/showthread.php/195024-Make-a-NSX-quot-Titanium-quot-Monel-Key-work-for-97?p=1893445#post1893445

attachment.php


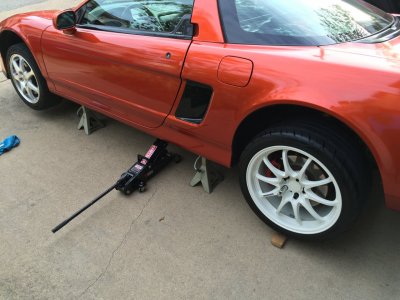
Volk CE28N in 17/18 - White

I wanted some timeless wheels that would give me a more aggressive look and be
able to put on some better tires. While I was sorting out my sizing and offset
questions, another primer hit me up with a great deal on a used set with tires
included so I just couldn’t pass on them.

CE28N
17x8+38
18x9.5+40 (ended up putting a 11mm spacer with integrated lugs to bring it to +29)

Yokohama S-drive
215/40-17
265/35-18

http://www.nsxprime.com/forum/showthread.php/195160-Volk-CE28N-size-17-18-Advice-Needed

attachment.php


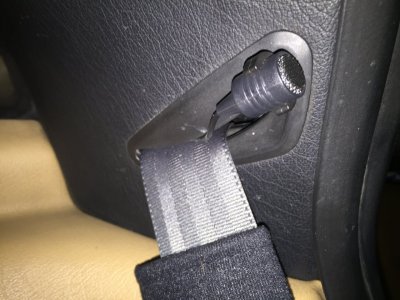
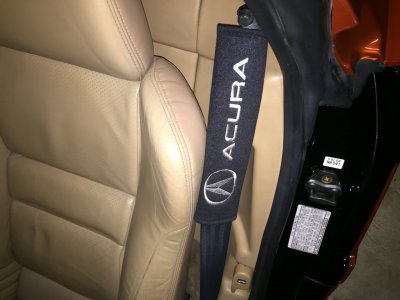
Seatbelt "Acura" Cushions

I think these actually look pretty sharp for $15 off eBay. Plus they are really
comfortable.


attachment.php


Throttle Body Cover

Bought this from SCW Performance in Wrinkle Red with the NSX cutout. Very slick
and I think really helps finish out the engine bay.

http://www.s2carbonworks.com/91acnsxscwgt10.html

attachment.php


Front Lip – Wingwest

I did the Wingwest W-type Front lip made from Polyurethane. I think it is one
of the best looking lips and it will stand up to the abuse like the OEM lip.
All the other fiberglass or carbon fiber lips are just one speed bump or
driveway away from cracks. The polyurethane is just like the OEM and will last
and be flexible enough to deal with just about anything. I was able to get one
from another Primer for cheap but if you want a new one.

http://www.wingswest.com/catalog/Acura-1/Nsx-1/19912001-Nsx/Front-Lip-1000/19912001-Acura-Nsx-Wtyp-Front-Lip-Polyurethane.html

attachment.php
 

Attachments

  • 7.jpg
    7.jpg
    205.8 KB · Views: 1,393
  • 8.jpg
    8.jpg
    69.1 KB · Views: 1,388
  • 9.jpg
    9.jpg
    154.8 KB · Views: 1,385
  • 10.jpg
    10.jpg
    142 KB · Views: 1,382
  • 11.jpg
    11.jpg
    296.6 KB · Views: 1,390
  • 12.jpg
    12.jpg
    99.6 KB · Views: 1,390
  • 13.jpg
    13.jpg
    30.3 KB · Views: 1,364
  • smarte8[1].jpg
    smarte8[1].jpg
    13.9 KB · Views: 1,381
  • 14.jpg
    14.jpg
    194.1 KB · Views: 1,370
  • 15.jpg
    15.jpg
    124.2 KB · Views: 1,385
  • 16.jpg
    16.jpg
    104.5 KB · Views: 1,376
  • 17.jpg
    17.jpg
    136.9 KB · Views: 1,382
  • 18.jpg
    18.jpg
    95.7 KB · Views: 1,374
  • 19.jpg
    19.jpg
    211.5 KB · Views: 1,368
  • 20.jpg
    20.jpg
    152.9 KB · Views: 1,375
  • 21.jpg
    21.jpg
    119.2 KB · Views: 1,363
  • 22.jpg
    22.jpg
    204 KB · Views: 1,364
  • Reinforcement%20Bars.jpg
    Reinforcement%20Bars.jpg
    22.3 KB · Views: 1,363
  • 23.jpg
    23.jpg
    232 KB · Views: 1,359
  • 24.jpg
    24.jpg
    135.6 KB · Views: 1,360
  • 25.jpg
    25.jpg
    172.8 KB · Views: 1,347
  • 26.jpg
    26.jpg
    225 KB · Views: 1,361
  • 27.jpg
    27.jpg
    145.5 KB · Views: 1,356
  • 28.jpg
    28.jpg
    197 KB · Views: 1,350
  • 33.jpg
    33.jpg
    504.7 KB · Views: 1,356
What part of Houston do you call home? I'm out in Fulshear and would like to hear your exhaust and compare notes.

There are also a couple of great roads between here and Sealy that make a great hour drive.

Don
 
What part of Houston do you call home? I'm out in Fulshear and would like to hear your exhaust and compare notes.

There are also a couple of great roads between here and Sealy that make a great hour drive.

Don
Don,

I'm off Allen Parkway next to downtown. Yea I occasionally head out that way for a drive. PM me and we can meet up for a drive.
 
A few more pics. Plus I got my new steering wheel back this weekend. I think it came out nice and will post additional details and links about that as well.

attachment.php
attachment.php
attachment.php
attachment.php
attachment.php
attachment.php
attachment.php
 

Attachments

  • 29.jpg
    29.jpg
    62.6 KB · Views: 1,269
  • 30.jpg
    30.jpg
    604.4 KB · Views: 1,278
  • 31.jpg
    31.jpg
    853.7 KB · Views: 1,282
  • 32.jpg
    32.jpg
    375.8 KB · Views: 1,283
  • 34.jpg
    34.jpg
    155.2 KB · Views: 1,269
  • 35.jpg
    35.jpg
    86.5 KB · Views: 1,273
  • thumb[6].jpg
    thumb[6].jpg
    246.9 KB · Views: 1,274
Steering Wheel

I picked up a used OEM wheel with airbag from another primer and sent it off to be modified. Since my original wheel was in such good order I just couldn't justify cutting it up. Hence it will go into storage. My wheel:

Flat top (no center stripe) & flat bottom in smooth leather
Side sport grips in perforated leather
Black leather with black stitching
Repaint the worn out horn symbols on horn buttons

Basically I was looking for a change but nothing too extreme. So after an exhaustive search looking for a new vendor other than the sole one on Prime who does nice work and is constantly doing new things. Thank you for all your work. However, I wanted to find someone that could give people an option. Here is whom I found.

Greg
Auto Dynamics West
24776 Lagrima
Mission Viejo, CA 92692
http://autodynamicswest.com/

Greg was super easy to work with and he could do basically anything you wanted, so all you guys craving carbon fiber and crazy colors should check him out. Also, I really appreciated the fact that he was very up front about sending the wheel to a Chinese steering wheel manufacturer to do the work as it is too labor intensive and costly to do this stuff in the States by hand.


My build was fairly simple and I received it in 5 weeks and paid $523 including return shipping. So the quality was top notch, fair price, and reasonable lead time of 4-6 weeks.

I really like how the flat top wheel flows better with our dash binnacle which is not completely circular. It has a slight bend/flatness at the top. Anyways here are some pictures and the instructions to remove and install your steering wheel from the NSX service manual.

attachment.php
attachment.php
attachment.php
attachment.php
 

Attachments

Beautifully done and so tasteful. Thanks for all of the links and tips. Well done sir.
 
Nice wheel and killer price!

Beautifully done and so tasteful. Thanks for all of the links and tips. Well done sir.

Thanks guys. As far as the steering wheel vendor, I didn't want to post details about it until I confirmed the quality of the work. I hope others get the same results if they choose to go that route. I didn't find this guy via word of mouth, I found him thru just calling and calling a ton of vendors that I found via the web. Searched as far a Australia so if someone ends up having a good experience with someone else or with this guy, I hope they post about it. The more options we have the better for the whole community.
 
Nice build!
I recently saw a Cars n Coffee video in Houston on YouTube and noticed you driving by haha.
 
Back
Top