Leatherique Dye Project begins

Joined
30 August 2005
Messages
5,406
Location
STL
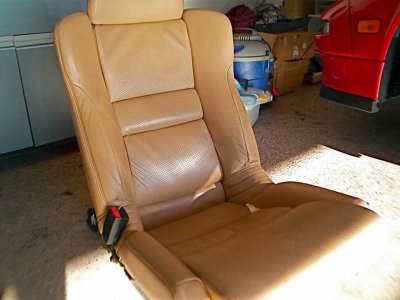
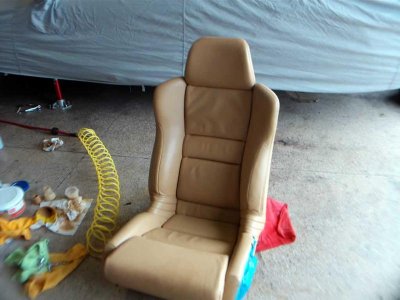
OK, UPS tracking shows my Leatherique Dye Kit will arrive tomorrow. So I pulled the seats out this afternoon and started to prep.

I sent in a swatch of tan from a seat cover that fourringpilot sent me when he went the Leatherseats.com route.

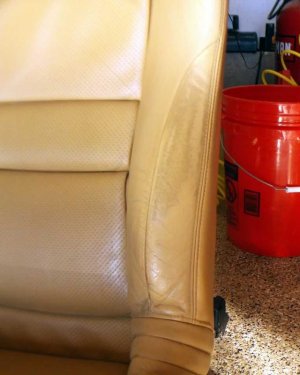
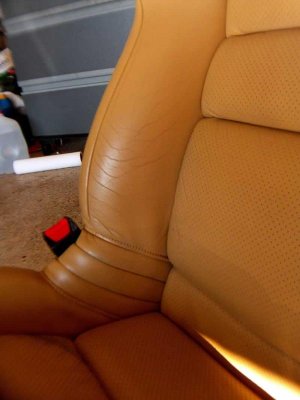
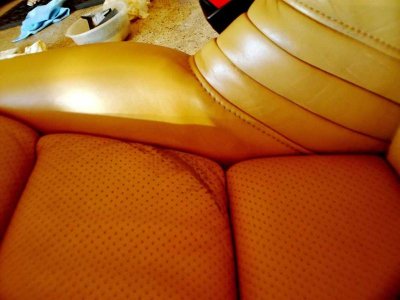
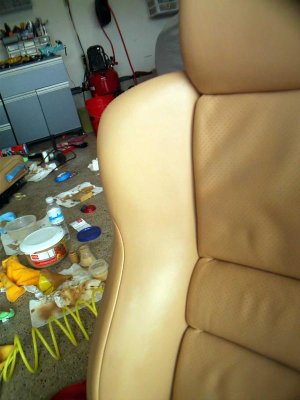
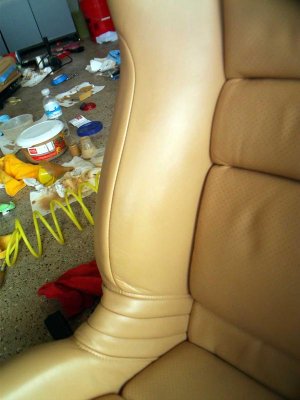
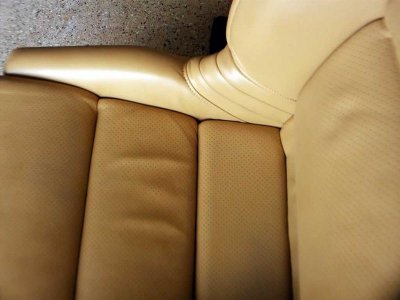
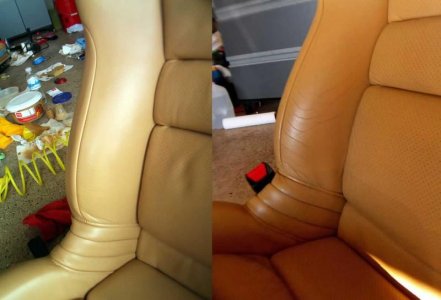
My seats are in good shape, but have bolster wear and the factory dye has worn off when it folded over and rubbed on the bottom cushion. As well, there are several spots where the dye is wearing thin.

I will try and document the process as I go. BTW: The kit I got comes with 36oz of dye, which is probably 6x the amount needed to do the two seats. So I will have some NSX tan dye for sale if anyone is interested in doing this (guess it will depend on how this turns out).

attachment.php


attachment.php


attachment.php


attachment.php
 

Attachments

  • Before1.jpg
    Before1.jpg
    54.9 KB · Views: 1,796
  • Before2.jpg
    Before2.jpg
    50.9 KB · Views: 1,792
  • Before3.jpg
    Before3.jpg
    37.6 KB · Views: 11,731
  • Before4.jpg
    Before4.jpg
    47.2 KB · Views: 11,676
Last edited:
1st update.

Tonight I wet sanded the drivers seat with 600 and then 1000. Baby butt smooth. One of the things I didn't like about the NSX leather is that it never felt soft like a well worn baseball glove - my Mom's new Lexus feels like this. I can't believe how smooth and soft it feels after the 1000 grit wet sand. It was amazing to see how many of the hairline cracks were in the dye not the actual leather and now are completely gone.
 
Last edited:
i used the leatherique kit once. it looked close to perfect when done but had to be redone three more times over the next couple months. seems to fade away over a few months.
 
challenge. . .

CL65 Captain, are you going to use any filler before dying the actual leather?
i used the leatherique kit once. it looked close to perfect when done but had to be redone three more times over the next couple months. seems to fade away over a few months.
Did you apply any sort of leather-specific sealant, generally available at leather-specialty/tannery establishments...(?)

(not that over-the-counter clean/conditioner & seal stuff)

When I redyed portions of my side-bolster and corners of my seat's lower-cushion, I used a special leather-only sealant (clear liquid in a rather small glass-bottle). It was slightly glossy/satin-like initially, but then over time conformed to the surrounding surfaces in terms of appearance.
 
Re: challenge. . .

CL65 Captain, are you going to use any filler before dying the actual leather?

After wet sanding, almost all of the small cracks are gone! :biggrin: Including the side bolsters.

There are only a few that might need filler just at the base of the side bolsters. I haven't decided as I would rather not if at all possible. I would assume that these would be the first to reappear down the line. I have been reading alot of threads on other boards about the process and it seems that the filler isn't a problem unless you use alot of it to fill big cracks and have to really build it up with multiple layers - ie a split or major crack.
 
Last edited:
Great project. Looking forward to seeing your results.
 
i'm an experienced user of this product. test first before using the clear coat! :redface:

you might not like it. I wish I didn't do it on my other car.

I didn't plan on the clear coat. One review said that it reminded him of Grandma's sofa with the plastic slip covers. :biggrin:

You might try wet sanding it with 1500 grit very lightly to get rid of the shine.
 
Last edited:
I didn't plan on the clear coat. One review said that it reminded him of going to Grandma's sofa with the plastic slip covers. :biggrin:

You might try wet sanding it very lightly to get rid of the shine.
I've fixed the problem and YES! I wet sanded it. Just didn't want you to go through the extra hassle like I did :)
 
How many coats did you put on?

I have a nice airbrush I bought and was planning on doing 3 light coats.
I did 3 coats with a 30lb spray gun. I had a fine mist tip. I'm not an expert on spray guns but it was just right for me. I would recommend doing it when the ambient temperature is +75 degs. The dye clumps otherwise - don't ask how I know this.

I think you'll get the feel for it once you do it. It was more difficult for me because I went from Tan to Black. Keeping it the same color is much easier. I would also recommend taking a brush applicator to get the seams and cracks and hard to reach areas before you spray. I had to do that after the spray gun but wish I did it before.

good luck. it's not a hard job just time consuming. took me about 3 wknds total including dry time. Then another week recently to remove the clearcoat.
 
OK, almost done.

I think Leatherique changed the formulation of their crack filler because it now has the consistency of paint, so it is practically useless as you would have to put 50 layers to build up enough to fill anything other than a hairline crack. Then when you do get it built up enough to fill a crack it would take you 6 hrs to sand it back down.

I used a brush to put down the first two coats and then let it dry for 6 hrs and sanded with 600 gritt. Then a final coat with the airbrush. After letting it dry for 2 days I will go back and sand with 1000 grit and be done.

If it didn't have the wear creases (which there is no way to fix) it would look 100% brand new.

Lots and lots of work to prep to get right. But if you take your time and do it right it looks great. An airbrush (even a $10 Pep Boys one) is a must.


attachment.php
 

Attachments

  • Seat_After1.jpg
    Seat_After1.jpg
    52.5 KB · Views: 304
  • Seat_After2.jpg
    Seat_After2.jpg
    50.1 KB · Views: 272
  • Seat_After3.jpg
    Seat_After3.jpg
    48.9 KB · Views: 257
  • Seat_After4.jpg
    Seat_After4.jpg
    44.2 KB · Views: 304
  • Seat_Comp.jpg
    Seat_Comp.jpg
    42.8 KB · Views: 1,532
Last edited:
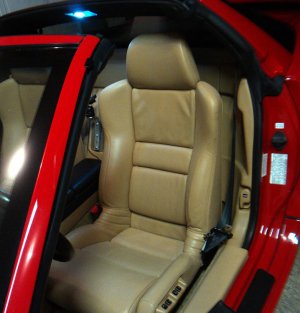
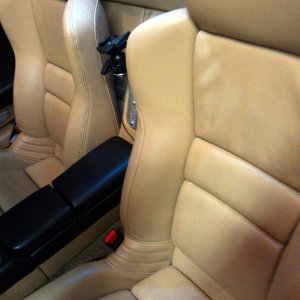
Finally finished! The seats look great and feel soft. Would I do it again? Yep, with one change.... the color match was so perfect that I should have just sanded down the parts with cracks and airbrush them instead of stripping the whole seat and redying the whole thing. I went to Harbour Freight Tools and bought a mini air paint gun that worked great - $17. If you do this, you MUST use an airbrush/paint gun to have it come out good.
 

Attachments

  • NSX_Seat1.jpg
    NSX_Seat1.jpg
    82.5 KB · Views: 379
  • NSX_Seat2.jpg
    NSX_Seat2.jpg
    99 KB · Views: 998
Last edited:
Very impressive results.
 
I have to say I'm pretty impressed with the way your seats came out. Only time will answer the durability question. I have the same problem, but I think a bit worse, on my same colored seats in my '94 Brooklands car. I think I want to give this a try over winter when I put the car away, so since you already vouch for the color match, want to sell some of your excess materials? I would think you should now be able to make a pretty good guess at how much would be needed to do one seat in the bolster area since you don't think it necessary to dye the whole seat anymore. PM if you would be willing to share or even if there would be a way to order EXACTLY the same color you got some way. Thanks, Tony
 
I have to say I'm pretty impressed with the way your seats came out. Only time will answer the durability question. I have the same problem, but I think a bit worse, on my same colored seats in my '94 Brooklands car. I think I want to give this a try over winter when I put the car away, so since you already vouch for the color match, want to sell some of your excess materials? I would think you should now be able to make a pretty good guess at how much would be needed to do one seat in the bolster area since you don't think it necessary to dye the whole seat anymore. PM if you would be willing to share or even if there would be a way to order EXACTLY the same color you got some way. Thanks, Tony

My leatherique application is going on almost a year now. If you're going from same color to same color then i'm sure the longevity of the product will be satisfactory. I went from tan to black and already i'm seeing minor flaking, or rather, hairline cracks, in the usual spots. It's very easy to touch-up however. Still very impressive for a DIY leather dye/paint.

If I could make one suggestion... I did mine first in the winter - BAD idea. Temperature was a big factor to making the finish A+. I'd say minimum 70 deg ambient temperature is required. I redid it in the spring. Awesome results.
 
Last edited:
UPDATE: The seats looked great....

until I drove it. After a weekend of my butt sliding around at the track anyplace where I had used the crack filler had opened up big time.

So I just sanded it down (PITA) and touched it up. Well see how it goes.

DO NOT USE THE CRACK FILLER!

The rest of the seats and the passenger seat (which I didn't use crack filler) look awesome.

If I had to do it over, I would have not stripped the whole seat down and redyed the whole seat. I would just do the worn areas and use an airbrush to blend it in.
 
Last edited:
Back
Top