- Joined
- 15 July 2008
- Messages
- 1,057
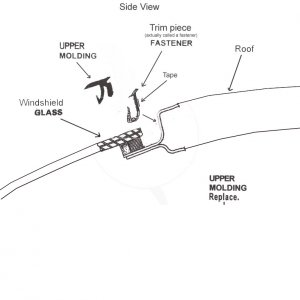
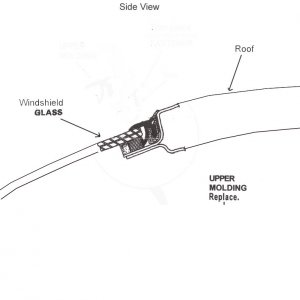
*WINDSHIELD*
hey guys,
would any of you guys have any suggestions or recommendations on where i should go repair my weather stripping above my windshield? question is...WHERE DID YOU GO? for your repair or replacement? My strip is about to get worse and I want to avoid that from happening....thanks guys in advance!

-Ron
hey guys,
would any of you guys have any suggestions or recommendations on where i should go repair my weather stripping above my windshield? question is...WHERE DID YOU GO? for your repair or replacement? My strip is about to get worse and I want to avoid that from happening....thanks guys in advance!
-Ron