REMOVAL of Engine Valve Cover for repainting?

Joined
15 October 2003
Messages
6,924
Location
West coast!
I decided to tackle this project myself since it seems easy enough. I plan to sand it down and paint it either red or white.

I see some 10mm bolts on top of the valve cover but is there anything I need to watch out for when removing this piece? Does it have to be torqued to a specific spec?

Mine is gray since my car is a 2002+ model year. Can anyone tell me how this is removed safely?

NSXR_manifold_cover_450.jpg
 
It isn't a hard job, but very time consuming.

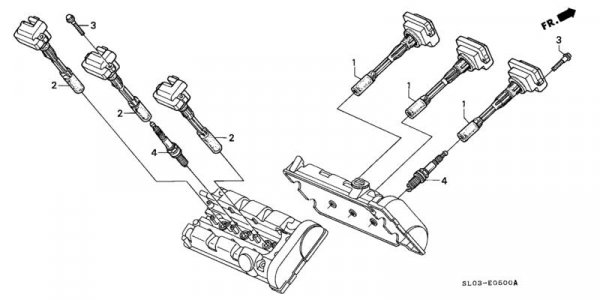
I think that the bolts that you are talking about are for the covers over the individual coils. Just take all of it off. Keep the parts for the front bank separate from the rear bank, they aren't the same. You will have a couple connectors that you will have to disconnect that go to the O2 sensors. Remember to push them like you are pushing them together and THEN press the release to get them apart. There is a rubber seal inside the connector that holds pressure against the release, that is why you have to push it together to get it to come apart. Use this same technique on the coil connectors too. Be sure to clean the old HONDA BOND out of the corners of the head where the valve cover gasket fits against the cam covers. Don't let it get into the engine, take your time. You will need to use Honda Bond here when you replace the covers too. Just a small dab in the corners.

You will want to use a chemical stripper to remove the old wrinkle finish. There are too many small pockets to hand sand the old finish off. Take a picture of the valve covers before you strip them to note where there is not paint around most of the threaded holes.

When you put it all back to gether remember not to OVER TIGHTEN the bolts that are threaded into the valve cover. The valve covers are made out of magnesium which will strip out if the bolts are OVER TIGHTENED.

I hope it is worth it,
Brad
 
i think he was talking about the manifold cover

hope you got it off ok, it should've taken 5 mins or so :biggrin:
 
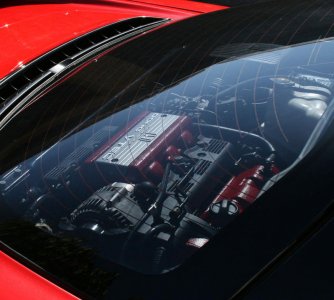
You don't have to remove the crinkle finish unless you want to, just paint over it - worked a treat for me, although I had it done by an experienced car restorer. See the picture of end result.

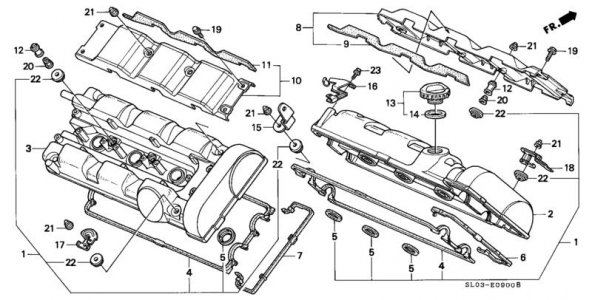
For me the trickiest part was getting the rear rocker cover out and back in - tight fit, plus the rubber gasket around the edge is difficult to hold in place during re-assembly. Study the dissambly diagrams first, there may be more parts than you are expecting, and you must reassemble them in correct order. Check out the attached diagrams, for example the order of items # 12, 20, 21 & 22.

The torques are all in the manual, but personally I don't bother with small bolts like these (mainly 6mm) that aren't critical, since I can "feel" the right torque, but that only comes with experience... experience like breaking threads off in a cylinder head ! Don't go there, use a torque wrench ...
 

Attachments

  • 13SL00_019_1.jpg
    13SL00_019_1.jpg
    69.2 KB · Views: 341
  • 13SL00_018_3.jpg
    13SL00_018_3.jpg
    35 KB · Views: 278
  • IMG_0767.jpg
    IMG_0767.jpg
    83.8 KB · Views: 339
Last edited:
Back
Top