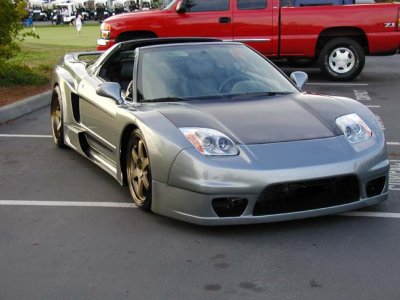
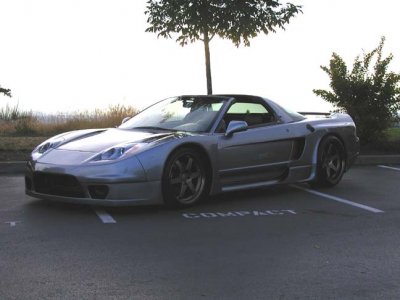
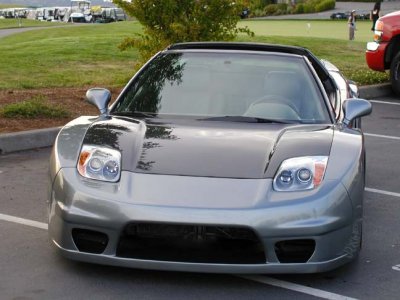
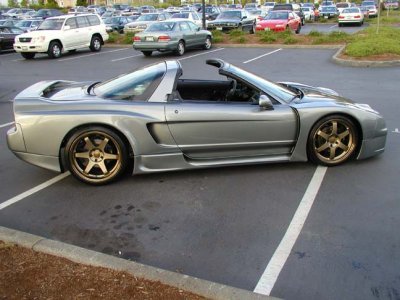
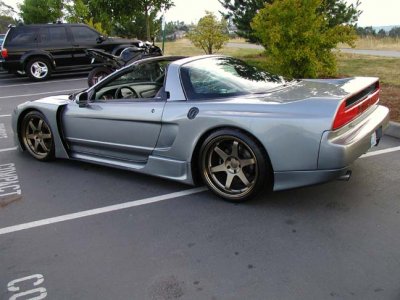
Jeremys 1998 NSX widebody with Umbrella Auto Design air cup vids

Joined
2 May 2003
Messages
1,451
Location
Seattle, Wa
A few vids of Jeremys recently completed personal project NSX equipped with www.umbrellaautodesign.com push button height adjustable suspension and used in conjunction with tein ra coilovers.

http://www.youtube.com/watch?v=ys6zCuSJIYQ

http://www.youtube.com/watch?v=RzcYJkBZNW8

http://www.youtube.com/watch?v=Xf8eUrcE-xc

this build was an impressive feat as all work on this car excluding the suspension system(which was done by Myself and Jeremy) was done personally by Jeremy M (nssexy91)

A few details:

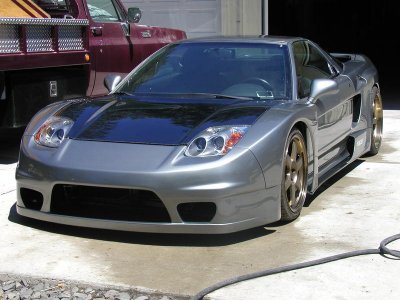
1998 NSX
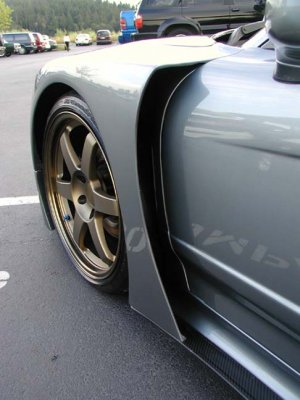
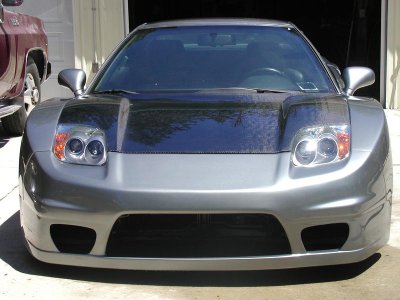
sorcery widebody
complete concourse quality paint job
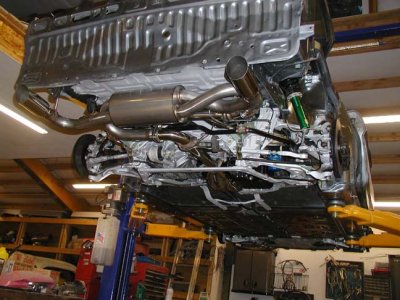
all undercoating stripped
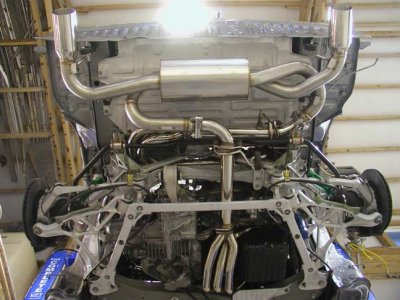
full undercarriage repaint
all suspension removed and baking soda blasted
motor removed and fully cleaned and tuned
2002 front end conversion
sorcery front bumper modified to resemble Alpine NSX(by Jeremy)
Umbrella Auto Design height adjustable suspension.

Pics and a full write up of the build coming soon!!

Details on the suspension system can be seen here:

www.umbrellaautodesign.com

http://www.nsxprime.com/forums/showthread.php?t=89374

Enjoy

Ravi
 
Last edited:
Not to get off topic (thats very cool btw) but whatever happened to your car KANE? I used to come to the prime to check out your thread weekly.
 
Not to get off topic (thats very cool btw) but whatever happened to your car KANE? I used to come to the prime to check out your thread weekly.

Still working on that one but its on the back burner right now, I've been so busy with my shop no time to finish.

I just bought another nsx to use as a driver. 1992 with 15k original miles.
so far on that one:
built motor
built trans
headers
test pipes
exhaust
my suspension system
other random gadgets and doo dads: )

check my website for details of both project cars soon!

thanks

Ravi
www.umbrellaautodesign.com
 
Looks great! I love Sorcery stuff alot, their bodykits looks amazing on NSX. I wish they make one for my CGT :tongue:
 
car looks hot!
and the suspension works good too!
 
Hi Kane,

Thanks for the pictures. Look very cool seeing the car going up and down.

Have a question about the baking soda blasting.
How does that work ?? What is the result of that and do you need any special equipment to do that ??
Any pictures on that reworked underside ??
 
Hi Kane,

Thanks for the pictures. Look very cool seeing the car going up and down.

Have a question about the baking soda blasting.
How does that work ?? What is the result of that and do you need any special equipment to do that ??
Any pictures on that reworked underside ??

Hi you can see pictures of one of my cars here with before and after pics of the soda blasting and undercoating removal. Its very time consuming and messy but the results are awesome.

http://www.nsxprime.com/forums/showthread.php?t=49438

I personally have used a special apparatus to do the soda blasting but Jeremy just purchased the blasting media online and sprayed in a standard sand blasting cabinet. The only downside to this is you can't meter the flow rate of the media so you waste alot.

Ravi
www.umbrellaautodesign.com
 
Thanks for the nice comments. I just took some pictures of the car.
I would also like to share the awesome experience I have had with the install and performance of the Umbrella auto design Air ride system. Here is a basic overview of the finished product.

- Removal of Tein RA coiliovers
Once the struts were all removed we went forward and disassembled the upper bearing plates etc. to install the air cups. The Air cups were then installed and the strut was reassembled. The struts were then ready to be installed on the car.

-Air line routing
We then hooked the air hose to the elbow fittings coming off the air cups. and ran them through the same hole as the brake line with no problem or drilling of any holes. We T'd together the front air cups with the T fitting located at the center of the car down by the steering rack. then ran the air line all the way back through the center Tunnel underneath the car and into the trunk. The rear air line hook up was the same but just a shorter distance to the trunk.

-Air pump and tank mounting

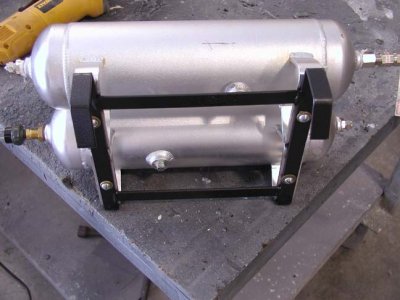
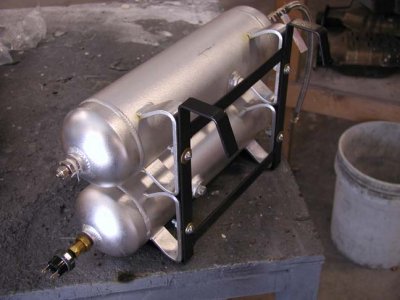
I did not run the power antenna on my car , so in replace of it I mounted my air pump to that same bracket and worked out great. An alternative route which would have been easier, I found the hard way, would be to mount it directly to the floor. There would be easier access to bolting it down then my way. I built a custom air tank bracket with detailed pictures included. I cut small cuts in the carpet so the legs of the bracket could be double back taped, glued, or bolted down.

-Wiring and valves

The valves were secured and grounded behind the carpet. We then made the harness that ran into the cabin of the car. We took the switched power from the fuse box in the engine compartment that has a built in in-line fuse and relay for added safety. The switches were then mounted in the ash tray.

-The Umbrella effect :)

The air ride system far exceeds my expectations. For one, the convenience of never having to worry about destroying my custom front bumper is great! The handling, and suspension of the car is not at all affected by the air cups. The ride is not stiff, just like how it would be with a set of normal Tein RA's. BEST OF ALL, as opposed to Air Bags, if there is a air leak in the system the car will not come crashing down at what ever top speed you are going. In the umbrella air cup kit If there were to ever be a system leak while you were driving, it would obviously never go lower than my desired ride height on the street which is where I want it to be. Then finally the BLING FACTOR!! when people are already looking at your car at the stop light, to be able to lower it is priceless :)
 

Attachments

  • tank1.jpg
    tank1.jpg
    56.8 KB · Views: 77
  • tank2.jpg
    tank2.jpg
    53.5 KB · Views: 77
Ok finally here are some pictures of my car. I have 50+ pictures of the build which i will post soon. But anyways, here is the finished product. Enjoy!
 

Attachments

  • newcastle3.jpg
    newcastle3.jpg
    61 KB · Views: 276
  • newcastle1.jpg
    newcastle1.jpg
    53.1 KB · Views: 204
  • newcastle2.jpg
    newcastle2.jpg
    64.7 KB · Views: 209
  • newcastle4.jpg
    newcastle4.jpg
    74.9 KB · Views: 320
  • newcastle5.jpg
    newcastle5.jpg
    70.6 KB · Views: 289
Some more. I will do a better write up of what was done when I post the build pics. Plenty more to come.
 

Attachments

  • newcastle6.jpg
    newcastle6.jpg
    59.5 KB · Views: 165
  • o my.jpg
    o my.jpg
    63.3 KB · Views: 170
  • o my 2.jpg
    o my 2.jpg
    77.2 KB · Views: 242
  • nsxprime.jpg
    nsxprime.jpg
    79 KB · Views: 263
  • nsxprime1.jpg
    nsxprime1.jpg
    84.8 KB · Views: 224
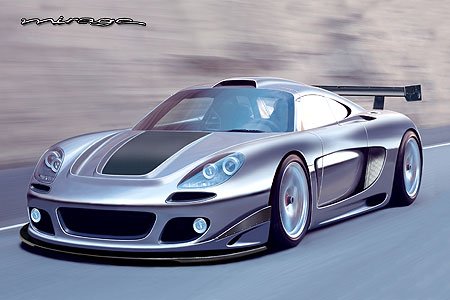
This is what you need for the carerra gt

LoL, thanks for the info. Actually i still like the stock CGT look, especially the stock wing. :biggrin:
Your suspension system is really cool, it makes the NSX more exotic. :wink:
 
I was bout to say the spats look familiar.

nsexy91- car looks amazing SOS front fenders ? direct fit on the sorcery fender ? what spoiler you going to put on ?

ravi- the system is something i have to consider if I build another one. great system
 
Hey Nico,

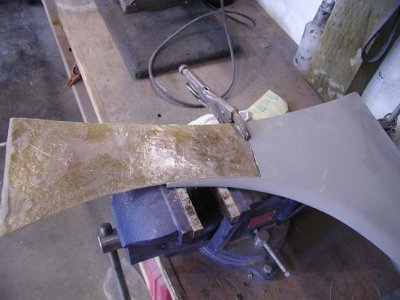
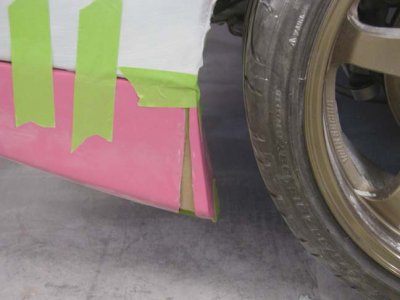
Yes those are your spats. I modified them a little to fit the wheel opening. Also cut the fin off the underside. I included a picture.

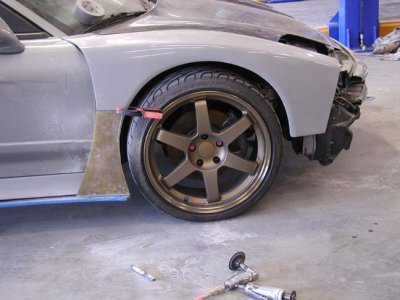
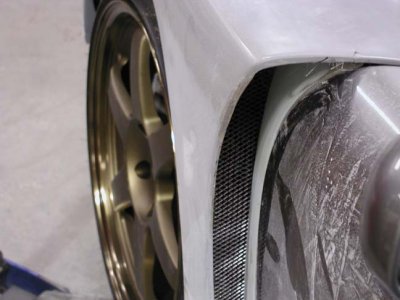
The front fenders are custom made by me. I started with regular sorcery fenders and modified them also. I included a picture.

The third picture you can see I built a custom door hinge cover that mimics the original fender. I have more pictures of it, but I need to find them.

I think I am going to stay with the stock rear spoiler, I can't find one I like.
 

Attachments

  • modifiedfender.jpg
    modifiedfender.jpg
    57.9 KB · Views: 105
  • modifiedfender2.jpg
    modifiedfender2.jpg
    60.3 KB · Views: 120
  • modifiedfender3.jpg
    modifiedfender3.jpg
    51.2 KB · Views: 109
  • modified spat.jpg
    modified spat.jpg
    41.3 KB · Views: 91
Back
Top