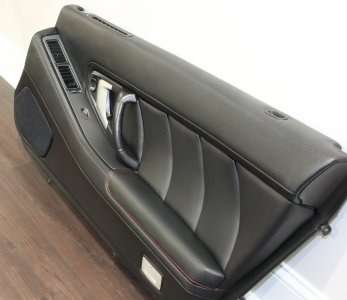
I recently refurbished my 02 NSX interior and also started on my 91. This is how I removed the bubbling metallized foil.
First, know that different year interiors may have different finishes. For example 02+ has a layer of paint over black chrome foil, while the 91 doesn't have paint, just the dark colored foil.
The foil is comprised of a copper substrate with usually chromium or zinc plating on top. We use Ferric Chloride (normally used as a PCB etchant) to remove the metal and preserve the plastic. Please note this may react with Bondo or other fillers so I do not recommend it if your parts have been modified.

Here we have the trim from an 02, which was previously wrapped in vinyl.

Use paint stripper to remove the outer paint layer. This will not harm the foil but will melt the plastic underneath so be quick and rinse off right away or you will have to repair it. For 91-?? this step may not be necessary. I suggest trying a small spot to see if anything comes off. If not go straight to the Ferric Chloride.

Here all pieces are stripped leaving a rather beautiful black chrome look.

Next I use Foodsaver bags to hold all the parts and fill the bags with Ferric Chloride solution. No need to vacuum seal the bags but an airtight seal is enough. Be careful as Ferric Chloride is very corrosive and will rust any iron or steel nearby. Make sure to use gloves and eye protection. This stuff will stain anything it touches and you do not want it getting on your skin or worse in your eyes!
1 gallon will be enough for 1 car, I bought mine off Amazon. My local electronics store also carries it but Amazon was cheaper. In order to conserve the solution, I put the bags in boxes just slightly large enough to fit the parts, and used towels underneath to keep the solution touching maximum foil surface area.

Next, wait patiently. The solution takes time... I left my parts for about 2 weeks, checking every few days. Most of the foil has melted off, but there may be some stubborn bits.

Here is the driver's side which has been scraped with a razor blade to get the stubborn bits. The passenger side has not been scraped yet. These should come off easily as they are thicker and will scrape easier. Took me about 5 mins per side.

Now these are both scraped and sanded with 320 grit. Ready for primer and paint!

Here all pieces stripped and ready for paint.

The final result, using primer for plastics and custom mix automotive single stage paint with clearcoat. The extra ashtray door is a new stock piece purchased for color match purposes. Not an exact match but once in the car very close. Will post in car pics soon! Hope this guide helps you!

Sent from my iPhone using Tapatalk
First, know that different year interiors may have different finishes. For example 02+ has a layer of paint over black chrome foil, while the 91 doesn't have paint, just the dark colored foil.
The foil is comprised of a copper substrate with usually chromium or zinc plating on top. We use Ferric Chloride (normally used as a PCB etchant) to remove the metal and preserve the plastic. Please note this may react with Bondo or other fillers so I do not recommend it if your parts have been modified.

Here we have the trim from an 02, which was previously wrapped in vinyl.

Use paint stripper to remove the outer paint layer. This will not harm the foil but will melt the plastic underneath so be quick and rinse off right away or you will have to repair it. For 91-?? this step may not be necessary. I suggest trying a small spot to see if anything comes off. If not go straight to the Ferric Chloride.

Here all pieces are stripped leaving a rather beautiful black chrome look.

Next I use Foodsaver bags to hold all the parts and fill the bags with Ferric Chloride solution. No need to vacuum seal the bags but an airtight seal is enough. Be careful as Ferric Chloride is very corrosive and will rust any iron or steel nearby. Make sure to use gloves and eye protection. This stuff will stain anything it touches and you do not want it getting on your skin or worse in your eyes!
1 gallon will be enough for 1 car, I bought mine off Amazon. My local electronics store also carries it but Amazon was cheaper. In order to conserve the solution, I put the bags in boxes just slightly large enough to fit the parts, and used towels underneath to keep the solution touching maximum foil surface area.

Next, wait patiently. The solution takes time... I left my parts for about 2 weeks, checking every few days. Most of the foil has melted off, but there may be some stubborn bits.

Here is the driver's side which has been scraped with a razor blade to get the stubborn bits. The passenger side has not been scraped yet. These should come off easily as they are thicker and will scrape easier. Took me about 5 mins per side.

Now these are both scraped and sanded with 320 grit. Ready for primer and paint!

Here all pieces stripped and ready for paint.

The final result, using primer for plastics and custom mix automotive single stage paint with clearcoat. The extra ashtray door is a new stock piece purchased for color match purposes. Not an exact match but once in the car very close. Will post in car pics soon! Hope this guide helps you!

Sent from my iPhone using Tapatalk
Last edited:


