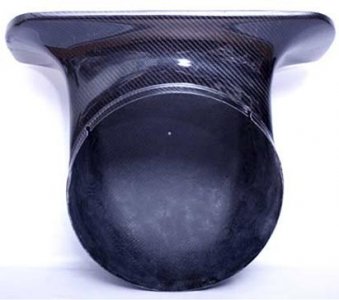
Drilling carbon hood. How?

Joined
8 March 2006
Messages
16,594
Location
Boston
I have a carbon downforce hood. I need to drill two 1/2" holes for my hood pins. What is the proper procedure for this without ruining the carbon, cracking the paint, doing bad things in general?

Pbasjjo can you shed some light on this for me or anyone else that has done this or is good at body work?

I was thinking of using a 1/2" spade bit. they tend to cut cleaner than a standard bit. I also have a dremel and a rotozip.
 
1. Mark holes with pencil or something.
2. Take exacto knife and score around clear coat the hole
3. Take small sharp drill bit and drill threw hood, make sure this holes centered
4. Take next size up drill bit and drill through hood
5. Take next size after that... Ect.
6. Don't drill to the exact desired hole size since it'll be rough so you'll need to sand slightly
7. Get out your dremel or a round file or something that you can sand any burrs and loose stuff down.
8. Seal the holes edges with epoxy or something strong.

Not sure what exact materials downforce uses but be careful not to overheat your drill bit and overheat your carbon/fiberglass.
 
Last edited:
I have used with ease and great end result a dremel with a thin stone bit. eats the CF like butter. now granted 99.9% of CF hoods are NOT rear CF and are actually fiberglass with cF mesh then a coat of clear coat.
with that said start small then test fit the pins, then dremel a little more till it perfect.

best solution out there, paddle bits, drill bits can do the job but depending on the speed of the bit can rip chunks out of the hood. dremel you can fine tune your speed and it fits in your hand

good luck
 
You are saying cut the clear coat with an exacto knife by hand first?
 
shawn can you post a picture of the dremel bit? or a model nmber?
 
dremel it no need for 4-10 steps for a hole. mark your holes with sharpie but only where your gonna cut anyway. plug dremel in turn dremel on push dremel into hood/marks test fit done.

mods lock thread LOL

- - - Updated - - -

im not at my shop hold on I will find a pic online

- - - Updated - - -

nbgfdbhgfsbgfbgfdbgfbgfdbgf.jpg

- - - Updated - - -

or something like this some are shaped like a triangle so you can start a small hole then get bigger if you want. but this style you can grind the side of the hole till it fits perfect.

a dremel kit at sear are like 22 bucks. and comes with all the bits you will ever need
 
I have the dremel and those bits already. Thanks.

- - - Updated - - -

Putting in a set of mini-latches.
 
I want to see where your attaching to under the hood on the rad support or somewhere. for future upgrade possibly
 
I'd go the dremel route if you already have it, but for others who are wondering - when I used to work on Yachts, to drill a hole through the fiberglass and gelcoat without creating chipping and damaging it, we would always drill a small pilot hole, then with the larger bit we would put the drill in reverse and start the hole - it works, albeit slowly, but it wont grab the gelcoat (or clearcoat/epoxy in carbon's case) and chip large bits out. Once through it, you could put the drill in forward gear and finish drilling the hole.
 
Why are you doing this? Are your concerns of the latch pulling loose from the hood? Such an expensive hard to get hood. I'm just curious.
 
Why are you doing this? Are your concerns of the latch pulling loose from the hood? Such an expensive hard to get hood. I'm just curious.

Yes, safety. There is a shitload of turbulence over and under my R hood. I can see it flicker ever so slightly. the amount of air that comes through that vent is just incredible. I have this which has actually quieted the flutter. I need some gaskets around the headlamps still.

df-aaa119.jpg
 

Attachments

  • df-aaa119.jpg
    df-aaa119.jpg
    27.1 KB · Views: 151
Last edited:
small drill first then go bigger when you know for sure its in the correct spot then get the dremel out, i put the mini quik latch in a while ago as my Vis hood was higher on one side than the other maybe it was getting hot from all the track time but one corner was sticking up and it looked off to me.
View attachment 104508View attachment 104508View attachment 104510View attachment 104511View attachment 104512View attachment 104513View attachment 104514View attachment 104515View attachment 104516
 
Turbo, thread the mini latches into the holes that are in the rad support, when they are in apply to them some dots of white out and close the hood gently on them this will mark the hood in the exact location, i just used a normal (new) drill bit and drilled through at that point. you can these use a dremel like suggested to open the hole up, just do it wide enough so you can still thread the latch part of the mini latch into the hole, Your hood is likely in 2 layers at that point so youll open the lower layer wider than the top layer. Now youll notice the retaining screw ring that threads onto the latch isnt that big and if you try and go too fast and go to wide on the top layer you're assed out when trying to use the threaded ring to keep the clip part attached to the hood. just go solw and deliberate

My advise is dont set the height of the latch posts until you have everything how you want hood gap wise. Then do a quarter of a turn at a time to the nuts at the bottom of the posts. too tight and you'll warp the carbon and it will slowly spider crack as you go over bumps. just go loose enough that its barely snug so you'll still be able to 'pop' the hood. the ball latch mechenism will still keep the hood from flying up even if relatively loose when clicked in.
 
Last edited:
Back
Top