DIY Timing Belt Question

Joined
23 December 2004
Messages
20
Location
Maryville, TN
I am in the process of changing the Timing Belt on my 91 I have owned since new. It is low mileage and this is the first TB change - first time head covers have been off for that matter. Thanks to this forum, Gary Kentosh, Larry Bastanza, and the shop manual, I have excellent directions. While the special tools and parts are on order, I decided to go as far as I could with the disassembly. I now have the head covers removed and a setup to easily turn the crank shaft clockwise. The (4) 5mm pin punches required had arrived, so I decided to put the crank on TDC and see how the punches fit into the holes in the cam shaft holder pipes and how they aligned with the holes in the cams.
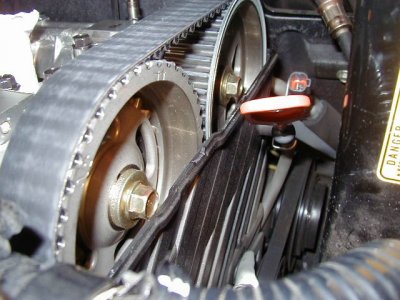
When the white mark was at the timing arrow, all the marks on both faces of the cam gears were at their expected places and three of the four pin punches dropped right into the holes in the cam shafts. If the 4th had fit also I would not be writing this....
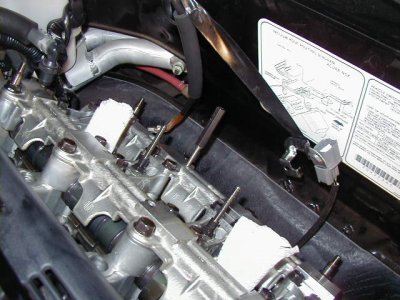
The pin did not fit in the front exhaust cam. The hole in the cam shaft had passed the matching hole in the holder pipe by the time I reached TDC.

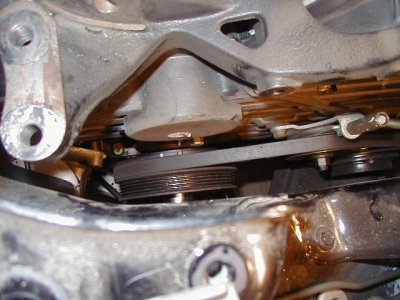
On my crank pulley there is the white mark at TDC, and there is a red mark a few degrees prior to that. When that red mark is at the pointer, THEN the pin punch at the front exhaust cam will go into place.
I assume there is no way that a cam gear can not be at the correct position on a cam shaft - are they keyed together? Since the gear marks all line up correctly and the car runs great I guess I will put it back together just like it was, but I am interested if anyone might be able to explain why the one hole does not line up. Another thing I noted is that the punch pins extend in farther in the exhaust cams. On the intake cams the pins extend 1.25" below the top of the camshaft holder pipe, and the pins go in 1.875" on the exhaust cams. Is it possible the hole in the cam shafts are different depths, or the cover may be a different height above the camshaft? I have attempted to attach pictures showing where the crank pulley is in relation to when the pin goes in the front exhaust cam - also a view of the front side of the front cam pulleys.
All comments appreciated.

Russ White - Maryville, TN
 

Attachments

  • TBCrankPos.jpg
    TBCrankPos.jpg
    57.7 KB · Views: 997
  • TBF5mmPin.jpg
    TBF5mmPin.jpg
    59.3 KB · Views: 964
  • TBFCamGears.jpg
    TBFCamGears.jpg
    57 KB · Views: 988
Last edited:
Russ

The pins are to hold the cams in position when you are putting on the new belt. I would guess with wear and strech they may not exactlly line up with the old belt on. Have you broken loose crank pulley bolt yet if not you don't want to have the pins in for that operation.
 
Brain - Thanks for your reply. No, I have not loosened the crank pulley bolt yet - waiting for special tools. The pin is in for the picture and just to check that they all fit before I did anything ( they didn't ). I appreciate the warning about not having then in when there is any change the crank could be turned. I read what happened to Dano and I will make sure that if I screw up - I will find a new way.

I think BarnMan is located in middle Tennessee in Nashville. Thanks for the idea of contacting him.
Russ
 
In thinking about the suggestion that the belt has stretched to explain what I have observed, that would not be an explanation since the timing marks on the cam pulley are correct at TDC - the hole just does not line up there. Why would the hole not line up when the pulley was at the correct position?

Russ
 
Gents,

Before we get too crazy here, the holes in the cams DO NOT always align:). First thing is to look at the two front cam gears and see that the TDC marks are aligned when the crank is at TDC (White mark and pointer aligned). If so, forget the front exhaust cam and the pin punch.

I had special pins made that have a step, so they fit tightly into the cam pipe and cam. They ONLY fit in the front intake and rear exhaust when you are exactly at TDC, and even then, on some engines the front intake cam pin is a tight fit. The point here is to always have a reference, so one cam is in the proper position on each head.

The 5mm punches are quite sloopy, since the holes in the cam pipes and cam shafts are two different sizes.

Russ,

Don't be too concerned about the front exhaust alignment unless you see the marks off on the cam gears. Since you have not removed the belt yet, I am sure it is OK. I think it is a good sign that you are carefully observing these type of inconsistencies, the job will come out fine:).

Remember to ALWAYS confirm that the crank has not moved from TDC, even 1/2 degree will totally mess up the belt installation. Once you remove the timing cover, you kind of fly blind, since the pointer is gone :eek:. So, if needed, you can temporarily reinstall the crank pulley and sight the white mark by looking down through the exact center of the water pump pulley.

In the third pic above it is clear the engine is NOT at TDC, I am guessing it is at the red mark (15 degrees BTDC), when you took the pic:). Remember the timing marks on both cams(intake and exhaust) must meet together. THEY DO NOT ALIGN WITH THE TOP OF THE TIMING COVER.

Keep us posted.

HTH,
LarryB
 
Last edited:
Larry - okay, breathing easy now. You are correct on what is shown in the picture. I wanted to show that the crank NOT at TDC was required to insert the pin in the front exhaust cam. When the time comes, I will pin the three that line up perfectly when at TDC and make sure the front exhaust cam is correct by the marks on its timing gear. I hope this post may be useful to others in the future when they may discover that, as Larry says, the holes in the cam and the holes in the cam pipe cover to not always line up.

Thanks for the encouragement. I am taking it slow, learning a lot, and enjoying it so far.
Russ
 
Larry Bastanza said:
Once you remove the timing cover, you kind of fly blind, since the pointer is gone...

Larry, you’ve got to help me with my memory here: I thought there was a triangle mark on the crankshaft gear (and a keyway) that you could align to a mark on the t-belt cover plate, thus avoiding to the process of temporally reinstalling the cover and pulley. Do you recall seeing such marks?

Russ, you are on the right track with being as detailed and particular about getting all the steps done right. Don’t hesitate to post questions here and I’d wait for a few opinions to come in before you make a move.

Good luck and keep us informed with your progress!

DanO
 
DanO said:
Larry, you’ve got to help me with my memory here: I thought there was a triangle mark on the crankshaft gear (and a keyway) that you could align to a mark on the t-belt cover plate, thus avoiding to the process of temporally reinstalling the cover and pulley. Do you recall seeing such marks?

DanO

You are correct DanO. Theres a pointer(arrow) and a mark(triangle) that needs to be aligned so the number 1 piston is at tdc.
 
Hi DanO and Joseph,

You are both correct, however when the engine is in the car it is very easy to mis-read those marks due to parallex error. Especially if it is your first time at it:). For me, just before I remove the belt, I check the arrows you mention to verify TDC (this is after the pulley was set to TDC using the white mark before removing the cover). After I reinstall the belt I use the pulley as my reference after I turn the crank 360 degrees to check the cam marks. Just happens to be my preference:).

HTH,
LarryB
 
Good job Russ,

Keep blazing the trail of asking the hard questions. I plan on tackling the belt after I get done with my Bose amps and will need all the help I can get...

Bill
 
I have been busy with other things for some time and now I read about this, be sure the crank is at the white marker and the pointers meet, check when ready and after the 360 degree turn, before I turn the engine I always give the belt some tension to prevent it from skipping a cam gear while turning by hand.

Remember to give tension 9 theeth on the cam (in stead of three doing civic accord etc.)loosen the adjuster and fasten.

I have done a lot of timing belts but the NSX is the most difficult one.
 
if you guys keep doing your own work how do you expect guys like me do be able to afford to keep driving an nsx. good luck with it.
 
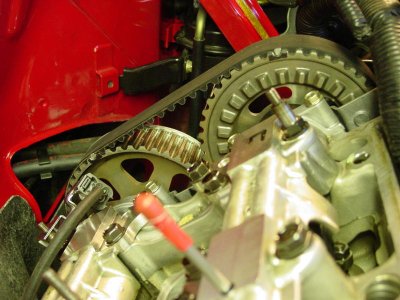
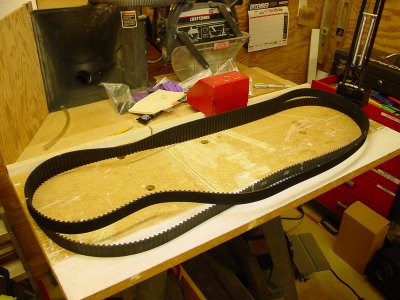
After I replaced my timing belt I happened to be over at Mark Basch's shop one day and was talking to one of his technicians and I mentioned how difficult it was to make sure that everything was properly lined up. He suggested taking white paint (or something similar) and making a mark on a belt tooth and it's corresponding location on the pulley. Do this for each of the cam pulleys and the crank pulley. Remove the old belt. Transfer the marks to the new timing belt. Install the belt with the white marks lined up to the appropriate location on each pulley and the belt is properly installed. No goofing around with pins and trying to see whether everything is lined up. Since the old belt is a bit stretched it will be necessary to rotate the cam pulleys a little bit, but not very much.

I slapped myself on the forehead and wondered why I didn't think of this.

Just when you have hopes that you might actually having a triple digit IQ something like this comes up that convinces you that two digits might be all you'll ever achieve.

John Crawford
 
(Elapsed Time: 7 years from last post. It is timing belt time!)

Larry, none of my cams are lining up: What gives?

I'm on TDC, the cam arrows are together and I'm using M5 bolts at pins, but the holes don't go through on any of the cams.

I'm temped to rock the crank back and forth, just a small amount, to convince the pins to line up and leave the crank at TDC.

I suspect I'm going to have to do this just a bit to take some tension off toward the trailing side to slip the belt on.

Any reason I should not do this?

Drew
 
Drew, I recall (and I think it is in discussion above) that many times the 4 pins won't all exactly fit when all the gear marks are perfectly aligned. I used the marking method (above a few posts) where I marked the gear teeth and corresponding teeth on the belt and then transfered to the new belt. I did initially pin the cams but may have had to unpin one or more cams to get the gears pointing at each other and have the new belt align to the marks I made on the gears. Hope this makes sense.
 
Bill

Makes perfect sense. I am planning on marking all the cams + belt and transferring the marks to the new belt. (I'm raiding my kids paint set as we speak).

It's a high risk "measure twice, cut once" operation, so I am checking everything twice.
 
I used a silver Sharpie on belt...not exactly common, but pretty sure it wasn't going to be rubbed off during installation. Used black Sharpie on metal.
 

Attachments

  • belt and gears marked.jpg
    belt and gears marked.jpg
    76.2 KB · Views: 404
  • Belts w marks.jpg
    Belts w marks.jpg
    87.8 KB · Views: 375
Last edited:
Back
Top