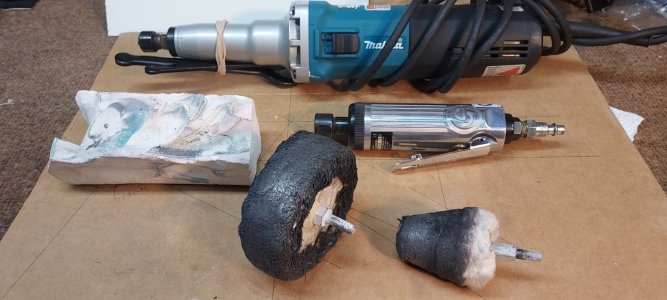
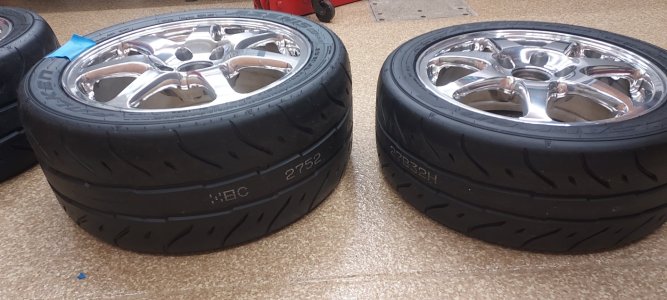
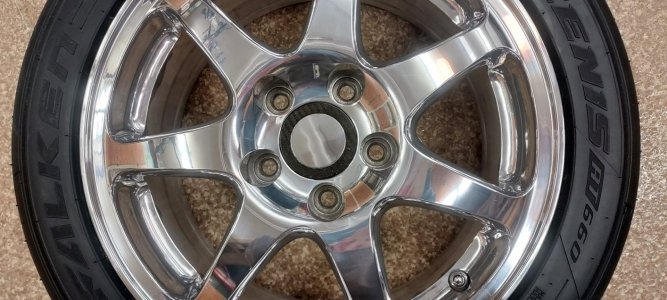
Recently got new Falken 615K’s for my OE polished 16/17’s and they scratched them a bit (will use a stick-on film next time). While the tools were all out thought I’d post for anyone that might want to polish alum parts. Brief cred – after college the 70’s not wanting to jump into an office seat and with a severe bike obsession, I had a brief three year stint turning wrenches for a top Harley dealer (AD Farrow) run by several pro level racers (yes the amf years). As the “custom” guy back then, i spent my evenings building show/street bikes. Since we polished or plated damn near everything and working with really good polish/plating shops, I learned polishing thus my confidence for this post. You say “won’t I ruin my wheels? or won’t I have to go thru several compounding steps? and purchase a huge buffing machine, or won’t I have to re-polish regularly?” – a strong NO you won’t/don’t. Take our OE wheels for example. Use aircraft grade stripper outdoors w/respirator (3m/purple filters) removing residue with a coarse green nylon strip pad followed by a quick soap/rinse. I now diverge greatly with the pro’s as they will go directly to a large fixed machine w/coarse compound /10” coarse buff wheels where they likely will round off at least a few edges and perhaps yield waves on large flat areas (good folks that are paid like nothing and not given the time to do a superior job). So we simply skip this entire coarse step and replace it with hand wet sanding with high grade wet/dry 600 grade sandpaper (3m or Norton). Cut paper into a few dozen approx 2” by 3” squares. Lightly sand every surface water spritzing with a spray bottle changing paper every couple of minutes. A purple abrasive pad will work, but paper will keep things nice and flat. You are not trying to “polish” here, just only looking for a nice 600 “grain” which comes VERY easily. Avoid buying a whole polishing kit as you won’t use most of it. There are three basic grades of buffing pads/wheels –hard felt/medium cotton bound/loose cotton. For 90% of purposes you only need the following(approx) sizes – a couple of 4” dia by 1” thk “medium” (three stiches on side) bound cotton and a couple of taper style (1” or so on the small end), all with ¼” mandrels While technically a high speed drill can power these wheels, for a job of any size I would pop for a proper rotary tool. I have traditionally used air operated die grinders (I prefer IR or CP but HF should be fine). Ignore the high mfrg,s “tool rating”speed as you will find that they all will run at around 1k plus or minus in this application which is perfect. While the speed is not critical, unless you have a 5hp/60/80 gal compressor, I recommend the electric corded Makita variable speed die grinder. It’s a best in class tool with many other uses as well. Purchase a large “bar” of White Rouge as it’s the ONLY compound you will be needing and will easily deliver 95% of the desired ultimate show finish. You are now ready to “load” the compound on your wheel by pressing your wheel into the bar moderately hard while spinning your tool slow-ish until the wheel is well coated( 5-7 seconds). You are looking for a uniform gray caking, but you cannot put too much compound on the wheel. This step is VERY messy as product will go all over your area and yourself, but it is not a toxic product and does clean up ok. I don’t like to do it outside in the sun, but shade is fine or if inside just cover up everything in sight. Start polishing on the wheel rim to learn and do about a 4-5” area at a time. You will only get a minute or so out of one “loading”. Watch the buff wheel face for the color –gray keep buffing – black –stop and re-load compound. Ideally you stop just before all the compound is gone. Keep the wheel moving at all times but very slowly. This small area you are working should polish up to final gloss VERY quickly – in just 20 seconds or so! Wipe that area with a dry MF and move onto the next area overlapping a bit continuing around the entire wheel. Have good lighting and inspect your work. If you see cloudy areas, simply go over it again until you get there. When doing the spokes move “along” the spoke as opposed to across it. At some point you will likely get some residual black smears or spots signaling you are keeping the wheel on a little too long(compound drying off) or not getting enough on to start with. If you are doing this on a 90 degree day or in the sun, you can “spritz” with a water sprayer to delay the compound drying time. I try to simply work faster instead. To remove aggravating stuck compound you have two options, wipe polish on and then do another quick power swipe, or usually I wipe polish on and then remove by hand with a small MF. If stubborn, mineral spirits/brake cleaner/ any solvent will work fine. My favorite hand polish this clean-up step (and refresh as well) polish is PPC EASY as it is very thin and thus very “easy” he-he to take off. You likely will have to get this online. Is it better than the rest? - Blue Magic. Wenol , Flitz, Meguires etc paste products? All of these are good, but all lean on the abrasive side to “get the job done” and these paste products are harder to remove. I’ve tried most and other than the very real placebo effect (!) they all deliver similar results as you have already achieved the best possible shine from the powered white rouge step itself. Be aware that since most all polishes now contain a bit of polymer, the polymer itself may produce a tiny cloud. If experimenting make sure to take off the old product first (a quick wipe with acetone) as the polymers from one brand may not like the new brand. Conventional mis-conceptions: You will read that a “final red or green rouge” step will further enhance your finish. While red & green do work well on other metals, it will do nothing for alum and you can certainly dull the white rouge finish. Another is that a final pass with a light load of white rouge or liquid polish/paste at a little higher speed with a 4” by 5/8” “loose” cotton buff will enhance shine. I did this for years but never really saw the enhancement, so I now longer bother with it. I do suggest that you purchase a 4” by 5/8” or so “loose” bound wheel and see for yourself as this step goes really fast and shouldn’t hurt. Now with the almost perfect finish, should you wax/seal/ceramic/self clear coat/have clear coated? My expertise now goes into speculation mode as I haven’t tried all these. I can say that generally anything WILL likely produce a slight cloud . Certain finishes (perhaps the diamond-coat) “may” be enhanced by a coating that possibly refracts the light(?) Unlike paint which needs emollients (oils) to shine, metal does not and thus any topping product is of questionable benefit in the shine department. So IMO the ultimate alum shine is probably from a polish that has minimal added polymers like the PPC and other wise “raw”. But this of course is for show conditions and not the real world where a very slight “cloud” may be warranted for folks who actually drive their car in weather - he-he . I was intrigued recently when I saw a qt paint shop product at Jegs that is specifically designed for clear coat wheels -hmm. I would perhaps purchase this and hand it to my paint shop with a piece of highly polished alum and ask for a test sample although my paint shop would likely want a good 1k to do a set of wheels! I assume that any coating be it paint/wax/sealant will likely help during wash/rinse but can’t really confirm that. I have historically used Menzerna Power-Loc sealant on my wheels, but recently stopped using it because I do notice the slight cloud when I put it on and don’t need any protection. Sealant or not, IF you think your polished wheels are losing their shine (they probably have not) you can give them a medium pressure quick wipe w/PPC . I can say that if you do not drive your car (again he-he) the white rouge does not seem to oxidize away as my wheels retain their original shine from more than 20 years ago! (my recent work was only spot scratch removal). Bottom line - polishing smooth alum does not have to be labor intensive, certainly not the maintenance headache of lore and a viable option especially for a “toy” ride. Yes you go to a car show and everyone is polishing their wheels. But they don’t get any shinier – some kind of endorphin thing that doesn’t personally work for me, but it may work for you! The only real drawback I see is that polished wheels DO require a bit more attention during the after wash dry process. You can’t just blow them w/compressed air and say done. You have to flash- dry them just like you do the paint. Not a big deal, but slightly more time required as water spots on a shinier surface DO show up more. Regarding existing nicks scratches before polishing – again I way differ from the standard – wet sandpaper good - coarse polish bad. If your 600 wet won’t take your scratch out, go down to 400 wet and then back to 600. While you certainly can go lower, chasing a scratch lower than 400 can be a real bitch. Rough casting follow up if desired and. Hit me for details/clarifications/mistakes/differing thoughts. All just personal antidote. Having said all this - the only thing I have considered polishing on my NSX has been the wheels. A little wheel bling is hard to resist- it comes with Testosterone doesn’t it? No shade to Ms May intended. I feel compelled to warn that eye damage may result from excessive personal admiration thru reflections from polished NSX wheels! Pic’s attached
ALUMINUM POLISHING DIY
- Thread starter TANTO
- Start date


