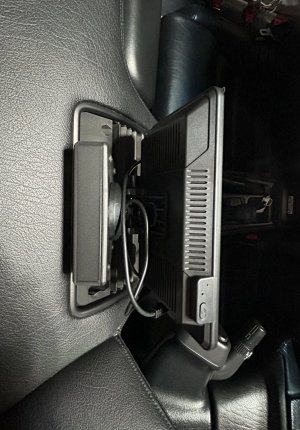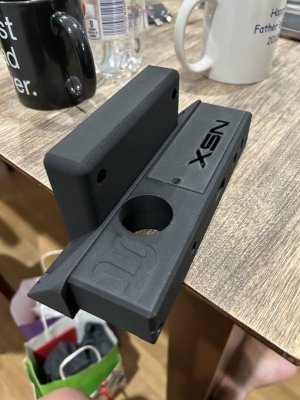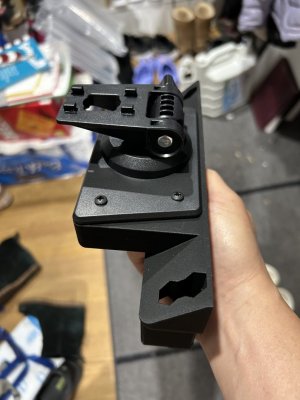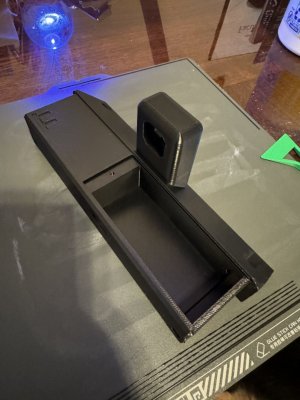

I missed having a backup camera and Navigation so I designed this. While not as slick as the NavPod, you can print it to bolt right in and replace the stock digital clock with a 7” Garmin Nav unit in minutes. Although you lose the clock display, the GPS can display the time in the bottom corner. Garmin devices do this, or the exterior temperature, or both, or a myriad of other configurable (trip data setting) things…
I used a Garmin DriveSmart65, which has a 7” screen. It links to your phone using Bluetooth to provide outdoor temperature, traffic, and weather data, and more. It has the stiffer ~46 mm disk fitting, as opposed to the 17 mm ball fitting, but I've included the files to use the 17 mm ball as well.
This mount fits into the clock location and uses the vent mounting screws (M4x16) that are behind it. I originally made it with clips identical to the stock clock, but it wasn’t quite solid enough for my liking, so I added holes for the vent mount. Unlike the factory NavPod, the vents do not need to be changed to smaller vents in order to install it.


The mount can be left in the car, but the Garmin unit can be easily detached to take to other vehicles or for theft prevention.
Perhaps best of all, if you decide you don’t like it, you can go completely back to stock in about a minute if you own a Phillips screwdriver.
Traffic:

Power:
The Garmin power supply usually plugs into the cigarette lighter. For a cleaner appearance, I used the clock power supply into the back of the mount. I used a standard 12V=>USB power supply with a mini-USB cable.


To use the clock power supply, use pins 1 & 4 for ignition-on operation. (2 & 4 if you want it always powered, to turn it on and off manually.) The pins are flat, 2.3x0.7x~8 mm but you can also use 1 mm solid core wire (18 Gage?) ~5 mm long. Solder it onto your adapter and then cut to length. The plug then clips into the connector hole in the back of the mount assembly to avoid rattling. If you use this clock supply, you lose the FM-based traffic from the antenna in the Garmin power supply, but the Bluetooth traffic through the DriveSmart ap is much better and includes outdoor temp, …

The mount has a hollow section to contain the electronics with a port to the front for the GPS power and a port in the back to hold the clock power supply connector. The slide-in cover for the hollow section has vent holes, now changed to the NSX logo. With a draw of only 0.3A, it doesn’t need vents, but I needed a spot to put that awesome logo! The screw is a 1/2” #4 . Black may be hard to find, but it’s hidden anyway so anything will do.
Backup Camera:

It can also be used as a Back-up Camera. The Garmin BC40 camera is wireless and requires no additional wiring or drilling holes – it installs over the plate in seconds, and also preserves “stock”. It’s powered by 2 AA batteries, which last a surprisingly long time, 9 months so far, but you probably want to carry a spare set. See this holder that’s much more aesthetically pleasing on the NSX than the chrome one included with the camera.
https://www.thingiverse.com/thing:4854107
Enforcement Radar and Weather Radar:
The DriveSmart65 can warn you of speed camera locations if you have that enabled.
You can also use the unit for weather radar, but only for passenger use; don’t try to be a meteorologist while driving an NSX (unless you actually are a meteorologist).


Printing:
Print files, instructions, and lots more pictures at:
https://www.thingiverse.com/thing:4975285
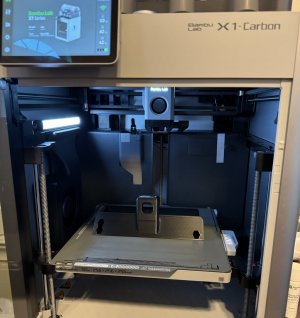
Print in ABS, ASA, polycarbonate, or PETG, 0.2-0.3 mm layers. No PLA! Be sure to print the device-specific fitting point laying on its left side to get the layers oriented for maximum strength. (There is a slight jog on the right.)
I’ve also made the fitting point for Garmin units with the 17 mm ball mount. Print horizontally with supports – it won’t look as smooth but will be much stronger and it’s hidden anyway. Depending on the Garmin unit you may want to shorten its length for aesthetics using the cut feature in Slic3r. PM me if you need instructions for this.
A 1/2” #4 screw can be threaded through a hole in the base to further fix the device-specific fitting point, but I found the friction fit adequate. Depending on your printer/filament, you may need to sand to an interference fit. (Cheap fibers “squat” a bit more.)
Last edited:


